Showing posts with label using. Show all posts

Sunday, March 19, 2017

How To Update Galaxy S Advance I9070 to Official Stock Android Jelly Bean 4 1 2 Using Odin

How To Update Galaxy S Advance I9070 to Official Stock Android Jelly Bean 4 1 2 Using Odin


galaxy s advance android jelly bean 4.1.2
Yesterday my friend brought his Galaxy S Advance GT-I9070 to update to Official Stock Android Jelly Bean 4.1.2. He was really suffering with many hangs and lags with his previous firmware Android Gingerbread. After Flashing Official Android 4.1.2, Now the phone is really smooth in touch and performance. The update will bring Galaxy S3 Android 4.1.2 like TouchWiz Nature UX UI, improved battery backup and some performance tweaks.

You can update your Galaxy S Advance to Official Android 4.1.2 via OTA or using Kies. If both of the methods not working to you follow this post to manually update Galaxy S Advance GT-I9070 to Official stock Android Jelly Bean 4.1.2 using Odin v1.85.

Note:
1. Backup your important data.
2. Enable USB debugging in your phone.
3. Battery must have 60% or more charge.
4. Disable or Exit Antivirus and Kies if you are installed.
5. Your PC must install Kies or Galaxy S Advance driver.
6. This method is only tested with Galaxy S Advance I9070 International version.

How To Update Galaxy S Advance to Official Stock Android Jelly Bean 4.1.2 Using Odin?

1. Download latest Galaxy S Advance Android Jelly Bean 4.1.2 for your country here.

* If you have any trouble finding firmware from the link, just comment below with your country, then i will post the firmware link.

2. Extract the downloaded firmware zip.

3. Download Odin v1.85 - Download

4. Now, Extract and Open odin3 v1.85.exe.

5. Power off Galaxy your phone.

6. Now boot into download mode. ( Volume down + Home + Power )

7. In download mode connect your phone to PC.

8. Now look in to Odin... ID:COM box, it will be yellow with a port name and Added! message will be displayed.
( If not it will the problem of driver or USB ... check both )

galaxy s advance jelly bean 4.1.2

9. In Odin..Click PDA button and browse to the extracted firmware folder and select the tar.md5 file eg. I9070XXXXXX_I9070XXXXXXX_HOME.tar.md5 finally Click Start button.

10. After complete update Odin will show PASS on top left and phone will reboot. now unplug phone from USB.

Thats it .... Done .

If you want to root the S Advance i9070 Android 4.1.2, follow the below post.

Galaxy S Advance i9070 Android 4.1.2, Root And Delete Unwanted System Apps To Speed Up The Device.


Available link for download

Read more »

Thursday, February 9, 2017

How To Stream Audio To A Chromecast Or DLNA UPnP Device From Linux Using pulseaudio dnla

How To Stream Audio To A Chromecast Or DLNA UPnP Device From Linux Using pulseaudio dnla


pulseaudio-dlna is a lightweight streaming server that makes it easy to stream audio from a Linux computer that uses PulseAudio, to a DLNA / UPnP or Chromecast device in the same network.

The tool discovers all UPnP / DLNA / Chromecast renderers in the network and adds them as sinks to PulseAudio. You can then either select the sinks from the sound settings, or use pavucontrol to control which applications can stream to the UPnP / DLNA or Chromecast device. 

Lets get started with installing and using pulseaudio-dlna.

For Ubuntu 16.04, 15.10 and 14.04, Linux Mint 17.x and derivatives, pulseaudio-dlna can be installed from a PPA. To add the PPA and install pluseaudio-dlna, use the following commands:
sudo add-apt-repository ppa:qos/pulseaudio-dlna
sudo apt-get update
sudo apt-get install pulseaudio-dlna

For how to install it in other Linux distributions, see the pulseaudio-dnla instructions.

Now, to run it, type the following in a terminal:
pulseaudio-dlna

On the other end, make sure the DLNA / UPnP or Chromecast device is powered on.

Next, open the system sound settings. In Ubuntu (Unity), from the Sound Menu, select Sound Settings and your DLNA / UPnP and/or Chromecast device should show up in the output list:


Select the device you want to stream to and... thats it (well, for DLNA / UPnP devices, you may need to accept the connection - a popup should be displayed on the device screen; Chromecast should start streaming immediately).

In my test under Ubuntu 16.04, the sound was perfect while using the default pulseaudio-dlna settings however, the sound was distorted when streaming to a Chromecast. To get it to work properly, I ran pulseaudio-dlna with mp3 as the codec and ffmpeg as the encoder backend:
pulseaudio-dlna --codec mp3 --encoder-backend=ffmpeg

Of course, this was the case for me, and it might not be needed in other cases. Update: pulseaudio-dlna was updated and mp3 is now prioritized over flac for Chromecasts.

Note: to be able to use ffmpeg as the encoder backend, youll need to install it. Its available in the official Ubuntu 15.10 and 16.04 repositories (so to install it, use: "sudo apt-get install ffmpeg") however, its not for Ubuntu 14.04.

For Ubuntu 14.04, you can search for a PPA that provides ffmpeg (use e.g. Y PPA Manager to search in Launchpad PPAs) - heres one that has ffmpeg backported from a newer Ubuntu version, but note that I didnt test it -, or install it from source.

pulseaudio-dlna allows changing the server port, force auto reconnect, set the cover mode (whats displayed on the DLNA / Chromecast device) and much more. To see all the available pulseaudio-dlna options, type:
pulseaudio-dlna --help

If you want to send single audio streams to the device, you can use pavucontrol. To install it in Ubuntu, use the following command:
sudo apt-get install pavucontrol

Then launch pavucontrol (it shows up as PulseAudio Volume Control in the menu / Dash) and on the Playback tab, change the stream to the DNLA / Chromecast device, only for the apps you want to use for streaming. As an example, heres Audacious set to stream to a Chromecast device:


For more information about pulseaudio-dlna, bug reports, etc., see its GitHub page.


Available link for download

Read more »

Tuesday, January 3, 2017

How To Stream To Twitch From Linux Using OBS Studio

How To Stream To Twitch From Linux Using OBS Studio


OBS Studio is a free, open source application which allows video recording and live streaming. The app can be used to stream to various popular websites such as Twitch.tv, YouTube, Hitbox.tv, Vaughn Live / iNSTAGIB.tv, DailyMotion, Connectcast.tv, GoodGame.ru, CyberGame.tv, CashPlay.tv along with custom streaming servers.

OBS Studio Ubuntu

The original Open Broadcaster Software was rewritten, with the main goal of being multiplatform, along with a more powerful API and a more thorough feature set. The new multiplatform OBS Studio is currently in alpha and is available for Linux, Mac OS X and Windows.

OBS features:
  • Encoding using H264 (x264) and AAC;
  • Unlimited number of scenes and sources;
  • Live RTMP streaming to Twitch, YouTube, DailyMotion, Hitbox and more;
  • File output to MP4 or FLV;
  • GPU-based game capture for high performance game streaming;
  • webcams, capture cards, etc. device support;
  • bilinear, bicubic or lanczos3 resampling;
  • configurable hotkeys, multiple audio tracks support and more.
In Linux, OBS allows recording a window or a monitor, on top of which you can add various overlays such as an image, text, webcam or media source and of course, audio input (microphone) and output (the game, a music player, etc.), with various options.

Below Ill try to make a quick start guide for streaming to Twitch.tv via OBS running under Linux (Ubuntu in my case). But before that, you can see a quick test Ive done earlier with OBS Studio (0.10.1) streaming World of Warcraft to Twitch from Ubuntu 15.04 (there are no video quality settings unfortunately because thats only available for Twitch partners).


Install OBS Studio (Multiplatform) in Ubuntu or Linux Mint


1. Install FFmpeg.

For Ubuntu 14.04 / Linux Mint 17.x / elementary OS Freya and so on, youll need to add a FFmpeg PPA because these Ubuntu versions dont provide FFmpeg. Add the PPA and install FFmpeg using the following commands:
sudo add-apt-repository ppa:jon-hedgerows/ffmpeg-backports
sudo apt-get update
sudo apt-get install ffmpeg
These FFmpeg packages are backported from Ubuntu 15.04 and they dont overwrite libav so they wont break anything.

For Ubuntu 15.04, FFmpeg is available in the official repositories so to install it, use the following command:
sudo apt-get install ffmpeg

2. Install OBS Studio.

To add the official OBS Studio PPA and install the app in Ubuntu 16.04, 15.10 or 14.04, Linux Mint 17.x,  elementary OS Freya and so on, use the following commands:
sudo add-apt-repository ppa:obsproject/obs-studio
sudo apt-get update
sudo apt-get install obs-studio

OBS Studio for other Linux distributions (unofficial packages): Arch Linux (AUR - git version), openSUSE and Gentoo.

For other Linux distributions, youll need to build it from source.


Setting up OBS Studio for streaming to Twitch.tv


1. Add your Twitch Stream Key to OBS


The first thing youll need to do to be able to stream to Twitch.tv using OBS is to get your Twitch Stream Key from HERE - copy the key and in OBS select "Settings" and on the Stream tab, select "Twitch" under "Service", then paste the key you just copied under "Stream key":

OBS Studio Ubuntu

Here you should also select the Twitch server thats closest to you.

2. Add sources

Next, youll want to add some sources. The first source should be the video (game) source so click the "+" icon under "Sources" and select "Window capture (Xcomposite)", click OK and select the game window:

OBS Studio Ubuntu

You can use "Screen capture (XSHM)" instead of "Window capture", but I recommend capturing the window because youll be able to have other windows on top of the game without them showing up in your live stream.

Then, add any other sources youd like, like "Video Capture Device" (webcam), "Audio Input Capture" (microphone), "Audio Output Capture" (the sound you hear through the speakers - it can be the game sound, a music player, etc.), text, an image and so on.

Note that the source order is important. For instance, if youre playing a fullscreen game and the webcam source ("Video Capture Device") is under the "Window capture" or "Screen capture" source, it wont show up, so youll need to move it using the up/down arrows so that the webcam source is above the capture source. The same goes for text and image overlays, etc.

3. Optional configuration tweaks

a) if your video colors are incorrect, select the source from the "Sources" list, click "Properties" (its the third button under "Sources") and enable "Swap red and blue":

OBS Studio Ubuntu

b) if your computer has a slow CPU and youre getting a low quality / fps live stream, you can try changing the x264 CPU preset to "superfast" or "ultrafast" (default is "veryfast"):

OBS Studio Ubuntu

This can be done via Settings > Output > select "Advanced" for the "Output Mode" from the dropdown > on the Streaming tab scroll down and youll find an option called "CPU Usage Preset".

If the performance is still bad, you can try setting a lower video resolution and bitrate (these settings can be found in the same "Streaming" tab as the "CPU Usage Preset" - see above).

c) if you have an old computer and/or a bad Internet connection, you may want to decrease the frame rate (default is 30) or, if you have a good computer and Internet connection and you play something like Arena/PvP, you my want to increase it.

The FPS settings can be found in OBS Settings > Video (you can switch to "Integer FPS value" to use a custom value instead of those predefined under "Common FPS Values"):

OBS Studio Ubuntu


You may also want to read the official OBS quick start and overview guides (but note that they are for the old OBS version so the UI looks different and some settings maybe not be available any more, etc.).

Report any bugs you may encounter with OBS, HERE.

Also see: Twitch.tv Indicator Lets You Know When The Channels You Follow Go Live


Available link for download

Read more »

Monday, November 7, 2016

How To Stream Videos From PC to Android Using ES File Explorer

How To Stream Videos From PC to Android Using ES File Explorer


I was written a post about Streaming Videos from PC to Android using Emit but recently i am started using ES File Explorer to stream videos from my laptop PC to Android phone (Galaxy S2). For me ES File Explorer works better than Emit. ES streams  the videos faster than Emit. While getting a better package like ES File Explorer for free why we want to go for a premium one ?

In this post I am writing the steps to connect and stream videos from PC to Android using ES File Explorer in both Anonymous and Authenticated ways. To Work both ways your phone and PC must connect to same network or router.

Download ES File Explorer From Google Play

Share desired folder in Your Windows PC

1. In your PC right click on the desired folder you want to share and select Properties.
2. In Properties Window navigate to Sharing tab and click Share button.

share folder in windows

3. It will open a new window...select Everyone in the drop down list ... click Add button then Share button finally on the other screen Done button.

share folder to every one in windows

Done ...You are shared the folder...Now follow the steps to connect phone to PC using ES File Explorer.

How To Connect ES File Explorer to PC using Username and Password ?

1. Connect Phone and PC to the same network or router.
2. Open ES File Explorer in your phone.
3. Swipe left or click local on top right and select LAN.


4. In LAN page Click New and select Scan.

es file explorer lan new scan

5. Now it will show your PCs ip address eg: 192.168.2.7 . Long press on it and select Edit server.

es file explorer lan pc ip edit server

6. In Edit Server page... uncheck Anonymous check-box and enter your admin Username and Password and press OK.

es file explorer lan pc ip edit server user name password

7. Now It will open the PCs ip page again...Just Click on the ip ... it will explore your PC with shared folder ...go to directory and select the video you want to play....Done !

How To Connect ES File Explorer to PC Anonymously ?

To connect Anonymously you have to setup some settings in your PC..Follow the steps below.
1.Open Network and Sharing Center.

open network and sharing center

2. Navigate to Advanced sharing settings and check Turn of password protected sharing radio button.

turn off password protected sharing

Done...Now take your phone and follow the steps below.

1. Steps 1 to 5 is same as the Connect using Username and Password method.
6. In Edit Server page... check Anonymous check-box and and press OK.

es file explorer lan pc ip edit server anonymous

7. Step 7 is also same as first method.

Thats it ...enjoy streaming.


Available link for download

Read more »

Saturday, November 5, 2016

Howto Content Locker using Jquery in blogger

Howto Content Locker using Jquery in blogger


Available link for download

Read more »

Friday, October 7, 2016

Install CyanogenMod 11 Android 4 4 1 Official Nightly Using Latest CWM Recovery

Install CyanogenMod 11 Android 4 4 1 Official Nightly Using Latest CWM Recovery


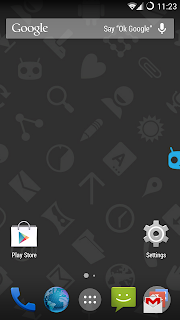
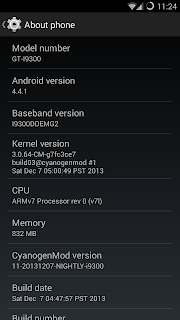
After the stable CM 10.2 Android 4.3.1 release, Yesterday CyanogenMod Team released the Official CM11 Android 4.4 builds for the recent nexus device like Nexus 4, 5, 7, and 10 etc. Today the team made it available to many none nexus devices with the old nexus brother Galaxy Nexus. The CM11 latest nightly is based on the latest Android 4.4.1 build.

Just installed the cm11 ROM in my Galaxy S3 I9300, Touch is very smooth and gives an awesome performance. Tested WiFi,3G Data, Camera, YouTube Playback, Music playback in headphone and loudspeaker, Call, SMS etc. every thing works well.

Update:(10/02/2014)
CM11 M3 Build released with an updated version of the Trebuchet launcher based on Android 4.4 Launcher3 code.The update also include some user experience tweaks, the auto-start tweaks, some additional transparency support, and more.


Note:
I used the latest Clockworkmod recovery to flash the cm11 ROM as some users soft bricked their device flashing cm11 using TWRP and old CMW. So it is recommended to use latest Clockworkmod recovery to flash the CyanogenMod 11 build.

Disclaimer
Flashing custom ROM may brick device or void warranty ... I am not responsible for any damage do at your risk.


Install CyanogenMod 11 Official Android 4.4.1 Nightly Using Latest CWM Recovery


Must Note:
- Download the correct ROM zip for your device model
- Use Latest CWM Recovery ( flashing with other recovery may brick the device ) - How To Install Latest Clockworkmod recovery ?
- Make a Nandroid backup or manual backup and copy all data to pc or any external storage
- Your battery must be 50% or above

1. Download CM11 build for your device - Download
2. Download Official Gapps for CM11 - Download
3. Copy both files to sdcard
4. boot into clockworkmod recovery
5. In Order to perform a bug free installation perform all the operations below.

- Select Wipe data/Factory reset - yes
- Select Wipe cache partition - yes
- Go to Mounts and Storage and perform mount system, mount cache and mount data.
- Then Format System - yes
- Then Format cache - yes
- Then Format Data - yes
- Go back main menu of recovery again and go to Advanced-> Wipe Dalvik Cache - yes

6. Now Start Installation Steps
- Select install zip from sd card then choose zip from sdcard, find and locate the downloaded rom zip file and tap Yes to confirm the flashing process.
- After Install the ROM zip similarly install the Google Apps zip file.

7. After Completing all the installation do a wipe again
- Select Wipe data/Factory reset - yes

8. Now Reboot your device.

Thats ...it ...done ....


Available link for download

Read more »