Showing posts with label in. Show all posts
Showing posts with label in. Show all posts
Sunday, March 26, 2017
How To Take Screenshot in Samsung Galaxy S Duos 2 S7582
How To Take Screenshot in Samsung Galaxy S Duos 2 S7582

Even Galaxy S Duos 2 S7582 is an upgraded version , It has not much improvement over Galaxy S Duos S7562. Some of the improvements of S Duos 2 S7582 over S Duos S7562 are Android 4.2 Jellybean, Dual-core 1.2 GHz CPU, HD Video Recording (1280 x 720 PX), Faster Download Speed 21 Mbps etc.
In this post I included the steps to take screenshot in Galaxy S Duos 2 S7582 without using any third party software. In this latest model too Samsung provides the same key combo which used in the Android Jellybean of Galaxy S4, S3, S2, etc.
Take Screenshot in Galaxy S Duos 2 S7582
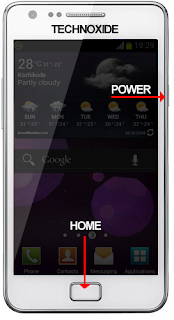
1. Go to the desired screen you want to capture.2. Then, Simultaneously press and hold the Power and Home button for 2-3 seconds.
Thats... You will hear a capture sound...if its success.
To get the captured picture Go to
Gallery -> Screenshots
Or
Go to /storage/sdcard0/Pictures/Screenshots
using any file manager.
Available link for download
In dữ liệu từ Table trong Java swing gui How to Print Tables Print JTable in Java swing gui
In dữ liệu từ Table trong Java swing gui How to Print Tables Print JTable in Java swing gui

Print JTable in Java swing gui
Java gui 2016
public void Print(JTable table,String head) {
 MessageFormat header = new MessageFormat(head);
 MessageFormat footer = new MessageFormat("Page {0,number,integer}");
 try {
 table.print(JTable.PrintMode.FIT_WIDTH, header, footer);
 } catch (java.awt.print.PrinterException ep) {
 JOptionPane.showMessageDialog(null, "Error "+head.toLowerCase()+"!");
 }
}
Available link for download
Friday, March 24, 2017
How To Take Screen Shot in Galaxy Core Prime SM G360H
How To Take Screen Shot in Galaxy Core Prime SM G360H
 Yesterday I bought a new Galaxy Core Prime priced 9,000 INR in India. For the price tag you will get a 5 MP camera, 1.2 GH Quad Core processor, 1 GB RAM, Android Kitkat 4.4.4 etc. After using a day I feel the device has better performance, decent battery life. I wish the Auto brightness feature should be there, but, no. In this post I include the available screen capture methods in Galaxy Core Prime.
Here is the simple and common method to take screenshot on Galaxy Core Prime. Like some other Galaxy devices Galaxy Core Prime does not have an option to screen shot using palm swipe. Here is the key combo method to screen capture Galaxy Core Prime.
How To Take Screen Shot in Galaxy Core Prime SM-G360H?
1. Go to the desired screen you want to take a screenshot.2. Now, simultaneously press and hold the Power and Home button for 2-3 seconds.

Thats it... both of the method above tested and works great.
To get the captured picture Go to Gallery -> Screenshots
Or
Go to /storage/Pictures/Screenshots using any file manager.
Available link for download
Sunday, March 19, 2017
How To Uninstall Remove APUS Launcher in Android
How To Uninstall Remove APUS Launcher in Android
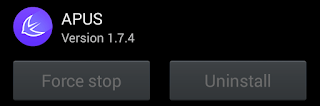 APUS Launcher holds the top position among Android third party launchers. Along with the Icon pack support it has built with some handy and useful features including APUS Mobile Search, APUS Radar, Smart Folder, Priority Apps, APUS Boost, etc.
Recently I tried APUS Launcher in my GS3 but, it wouldnt help me to keep using it even the mentioned features are available. When I try to uninstall the APUS Launcher It couldnt. In app manager Uninstall button was disabled. Then I noticed that I was activated the APUS in device administrators list to enable double tap screen lock. So deactivating the same will do the trick.
Follow the complete steps below.
Deactivate Apus Launcher in Device administrators
1. Go to Setting -> Security -> Device administrators
2. Tap on APUS and click Deactivate.
Or
1. Go to Setting -> Privacy -> Device administration -> Device administrators
2. Tap on APUS and click Deactivate.

Uninstall Apus Launcher
1. Go to Application Manager
2. Click on Apus Icon
3. In Apus App info page tap Clear defaults.
4. Finally, Tap on Uninstall
Thats it.
Available link for download
Friday, March 17, 2017
How to Show My Computer Icon in Windows 10 Desktop
How to Show My Computer Icon in Windows 10 Desktop
This Video will guide you to show Computer Icon(This PC) in the Windows 10 Desktop.Please watch in full screen mode to get better view.
REGARDS
Shankha Jana
Available link for download
Friday, February 24, 2017
How to Use PHP Code in WordPress Widget Without Plugin
How to Use PHP Code in WordPress Widget Without Plugin
Sometimes we need to put the PHP code into a WordPress widget but didnt work the code. Because WordPress does not allow to put the PHP code in the widget, but you can fix this issue with simple codes. If you want to use PHP code via a plugin, then a lot of plugins are available to provide this facility. But if you want to use PHP code without any plugin, then follow below steps.

Find your WordPress functions.php file and paste below lines:
add_filter(widget_text,execute_php,100);
function execute_php($html){
if(strpos($html,"<"."?php")!==false){
ob_start();
eval("?".">".$html);
$html=ob_get_contents();
ob_end_clean();
}
return $html;
}
Save your functions.php file and put your PHP code into WordPress widget. It will work Fine.
Incoming Search Terms:
execute php in widget, PHP in widget, use PHP in wordpress widget,PHP code for widget, execute php without pluginAvailable link for download
Saturday, February 18, 2017
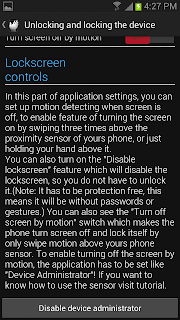
How To Uninstall Air Swiper App in Android
How To Uninstall Air Swiper App in Android
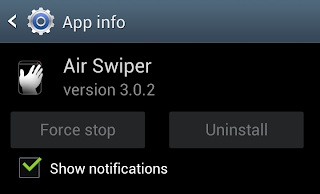
Before the recent Air Swiper update i was installed the app to test the features and after checking i was forget to uninstall it. Yesterday, when i tried to uninstall the Uninstall button was disabled in the Application manager. I thought it may be because of installation file missing or something else. When i searched in Google i found the Air Swiper Play store link as the first result. In the play store page the developer mentioned that there is a Uninstall application option available that we can get by scrolling down in the apps main page. As i was installed the old version i couldnt find any Uninstall option.
Again, I am checked the Google search result and i found that "To uninstall the application, disable Air Swiper as device admin. Go to the Settings->Security->Device Administrators and uncheck Air Swiper. Now you can ..." which was cached by Google. thanks Google.
Here is the detailed step to uninstall the Air Swiper for those who couldnt get from the above Googles cache!!.
How To Uninstall Air Swiper App in Android ?
1. Open Air Swiper app.2. Click Unlocking and locking the device.
2. Finally Scroll down and click Disable device administrator.
Thats it ... now uninstall app in Application Manager ( Settings -> Application Manager ).
Available link for download
Friday, February 17, 2017
HTC smartphone stuck in bootloader Solution
HTC smartphone stuck in bootloader Solution
How to fix HTC smartphone stuck in bootloader and wont turn on cause of low battery.
Solution : how to unbrick HTC android cellphone

HTC smart phones are best android cellphone in the market with competition of other well known brands. Sometimes HTC phones stuck into bootloader and wont turn on . The cause of this problem is your smartphone battery is too low , you were trying to update your android cellphone or you were playing with bootloader. This tutorial will only solve the problem and bring your HTC phone back from the problem if your HTC phone is stuck into bootloop caused by too low battery less than 10% and you are not able to charge your android cellphone battery via socket charger or usb .
Note: (3875mV is equal to 10% of battery charging).
So whats the solution ?
Debug mode is not necessary for this process . All you have to do is turn your htc smartphone bootloader.Method 1.
Copy these codes and paste them into .txt file then convert it to .bat file.
@echo off
:start
fastboot getvar battery-voltage
fastboot reboot-bootloader
ping /n 6 localhost >nul
goto start
Method 2.
Download the text file contain on these codes and rename .txt to .bat. You can also change file name .

use adb commands to write these codes step by step.
(Following method 1 and 2).

Copy .bat file into android-sdk folder . (C:Program Files/Android/Android-sdk/platform-tools ). Double click on .bat file . In the return you will see different lines running in command prompt . You will also notice battery voltage start increasing with every step. Your HTC android cellphone keep restarting after increase of every volt of battery. The process will take upto 1 hour(depend on the voltage of your battery) to increase your smartphone battery voltage to meet the minimum boot requirement by HTC. Minimum 3850mV is required to light up any HTC android cellphone but you can increase the mV level as high as you want.

- The following method was adopted from xda-developers.com and tested by myself. Android soldier does not claim any rights to above said method and programing file or codes. All credit goes to its original owner. All the logos are property of their respective owners. If you have inquiries regarding this post please write in comments section.
Available link for download
install Android apps games remotely in Android Smartphone and Tablets
install Android apps games remotely in Android Smartphone and Tablets
How to install Android apps & games remotely in Android Smartphone and Tablets .
Install directly from Google Play Store without touching Android Smartphones or tablets.
Google has facilitate its customer as much as they can . With incredible services and offers , Google is always world number 1 with search engine , Google play store ,developments, blogging, webmaster tools,SEO (search engine optimization ), advertising and of course Android and many more . On Google Play Store you can find million apps and games for your smartphones and tablet which facilitate and make your life easier. Its too easy to install apps and games via WIFI or 3G from Google Play Store. Tap Google Play Store Icon and simply find out what you need. There is another superb option or method for installing android apps and games remotely into your smartphone or tablet without touching or in case its thousand miles away from you .
1. On smartphone or tablet , Activate WIFI , or 3G . Then go to setting --Accounts--Add account--Gmail.
2. Add your gmail account and password.
3. Open https://play.google.com/store on your computer .

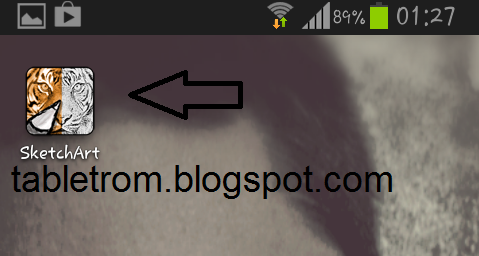
5.Choose any app or game . (for tutorial I choose Sketch Art).
2. Add your gmail account and password.
3. Open https://play.google.com/store on your computer .
4. Sign In with same Gmail account which you already added in your smartphones or android tablets.
5.Choose any app or game . (for tutorial I choose Sketch Art).
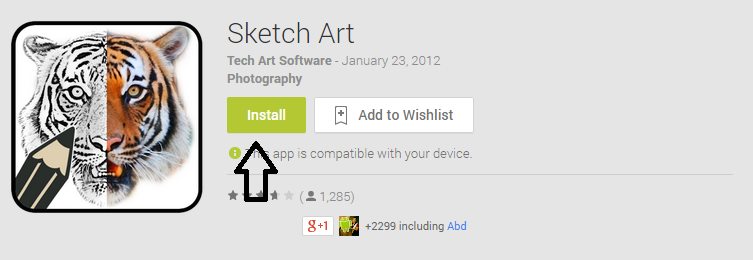
6. Click Install .

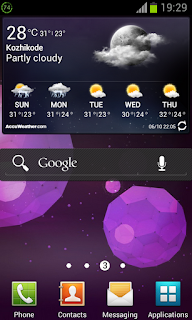
7. Choose a desired device (if you have more than one devices synchronised ) and click install . I have selected Samsung Galaxy S2 GT-1900 for the tutorial .

8.A Congratulations message will be appeared .
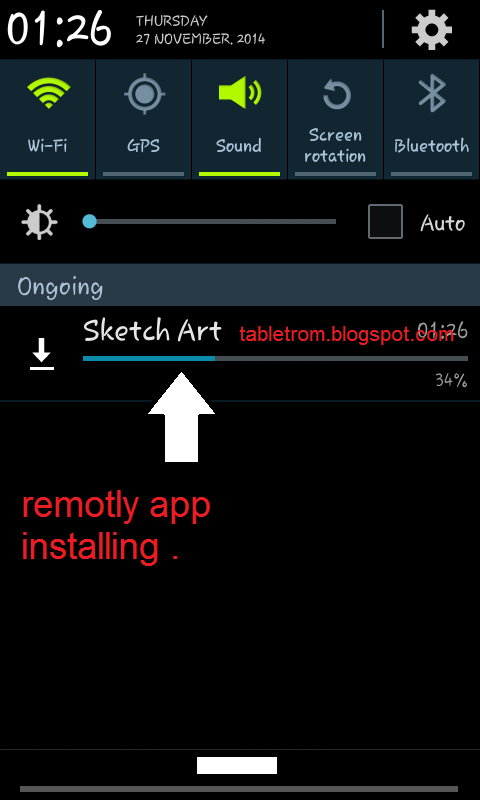
9. Just look at the smartphone you will see automatically application downloading will be started. (as shown above image).
10. You are done .
Now enjoy the great benefit of being Android and Google User.
Note:- All the logo and images are property of their respected owners.
Available link for download
Wednesday, February 8, 2017
How To Verify MD5 Checksum in Windows Mac Linux and Android
How To Verify MD5 Checksum in Windows Mac Linux and Android
Md5sum is a mixture of numbers and letters which is unique for every file or data. Commonly md5sum is used to verify the integrity of files, encrypt data, etc. We can ensure that we get the correct and complete file or data from the provider by verifying the md5 checksum.
As an Android user I am frequently changing ROM in my phone. In my home my broad band gives Does not have a valid IP configuration error at least once a day. Sometimes the error comes while I download the ROM package. So it is necessary to verify the MD5 checksum of downloaded file before flashing it as flashing the corrupted or wrong file is enough to brick the phone.
In this post i included the ways to check the file sum in Windows, Mac , Linux and Android.
1. Download and Install HashTab From Here or Here
2. After Installation .. Right click on any file you wish to check the md5sum and click Properties.
3. In the Properties window click on File Hashes tab to get the md5 hash details.

1. Open Terminal App and navigate to files directory.
2. Type md5 your_file_name.extension Or Type md5 followed by one space, then drag and drop the file to the terminal.
3. Hit Enter....and wait till the terminal returns the md5 hash....Thats it.
1. Open Terminal App.
2. Navigate to the files directory
3. Now type md5sum your_file_name.extension or Type md5sum followed by one space, then drag and drop the file to the terminal.
4. Hit Enter...done.
In Android there are many File Management apps available in Play store which gives md5sum along with other properties. I use ES File manager in my mobile since my first android mobile. So, I included the method to find md5sum in Android using ES File Manager.
1. Download and install ES File Manager from Play Store
2. Open ES File Manager and Navigate to the file you wish to check the md5 sum.
3. Long press on the file and select Properties from the More menu.

4.Now In the Properties Dialog...tap on Show checksum.

5. In the next dialog check MD5 checkbox and tap on Calculate.

Thats it done.
As an Android user I am frequently changing ROM in my phone. In my home my broad band gives Does not have a valid IP configuration error at least once a day. Sometimes the error comes while I download the ROM package. So it is necessary to verify the MD5 checksum of downloaded file before flashing it as flashing the corrupted or wrong file is enough to brick the phone.
In this post i included the ways to check the file sum in Windows, Mac , Linux and Android.
How To Check MD5sum Of File in Windows ?
1. Download and Install HashTab From Here or Here
2. After Installation .. Right click on any file you wish to check the md5sum and click Properties.
3. In the Properties window click on File Hashes tab to get the md5 hash details.
How To Check MD5sum Of File in Mac ?
1. Open Terminal App and navigate to files directory.
2. Type md5 your_file_name.extension Or Type md5 followed by one space, then drag and drop the file to the terminal.
3. Hit Enter....and wait till the terminal returns the md5 hash....Thats it.
How To Check MD5sum Of File in Linux/Ubuntu ?
1. Open Terminal App.
2. Navigate to the files directory
3. Now type md5sum your_file_name.extension or Type md5sum followed by one space, then drag and drop the file to the terminal.
4. Hit Enter...done.
How To Check MD5sum Of File in Android ?
In Android there are many File Management apps available in Play store which gives md5sum along with other properties. I use ES File manager in my mobile since my first android mobile. So, I included the method to find md5sum in Android using ES File Manager.
1. Download and install ES File Manager from Play Store
2. Open ES File Manager and Navigate to the file you wish to check the md5 sum.
3. Long press on the file and select Properties from the More menu.
4.Now In the Properties Dialog...tap on Show checksum.
5. In the next dialog check MD5 checkbox and tap on Calculate.
Thats it done.
Available link for download
Tuesday, February 7, 2017
How To Take Photosphere Photos in Android Stock Camera
How To Take Photosphere Photos in Android Stock Camera

May be because of that, yesterday Google released a tutorial on taking and sharing photosphere image on Google maps. The tutorial gives a clear idea on taking photosphere images using Android stock camera.In this post i am shared official photosphere tutorial video by Google, just check it out.
Available link for download
Monday, February 6, 2017
How to use any networks sim in Aircel Datacard Bsnl Airtel docomo
How to use any networks sim in Aircel Datacard Bsnl Airtel docomo
|
|

 |
|
| ||
|
| ||
|
| ||
|
|
|
|
Note:- There is important point to note. you must disable your pc antivirus before downloading and running this softwares. Softwares file appears as a virus for many antivirus but it wont harm you in any way. so just disable antivirus, you can enable it after unlocking. |
| ??? Related Posts ??? |
|
Available link for download
Saturday, February 4, 2017
How To Take Screen Shot in Galaxy S2 4 0 4 Stock ROM
How To Take Screen Shot in Galaxy S2 4 0 4 Stock ROM
Follow the simple steps to take screen shot in Galaxy S2 Stock 4.0.4 ROM.
Steps
1. Go to the screen you want to capture.
2. Simultaneously press and hold the Home Button + Power Button for 2 seconds.
Thats it. You will hear a capture sound and a Toast message. To get the captured image go to /sdcard/Pictures/Screenshots.
.
Available link for download
Thursday, February 2, 2017
How to Turn on USB Debugging in Huawei Honor 3X
How to Turn on USB Debugging in Huawei Honor 3X
Many users cannot find USB debugging in their Huawei Honor 3X phones, so they are unable to turn it on when there is necessity to do so. In consequence, this text will illustrate the method to turn on USB debugging in Huawei Honor 3X in detail.

Firstly, enable developer mode in the phone.
1ststep: Open Settings.
2ndstep: Find and choose About phone.
3rdstep: Locate Build number and click it for 6 to 8 times until a prompt informs you that developer mode has already been enabled.
Secondly, find and turn on USB debugging in Developer options.
1ststep: Go back to Settings.
2ndstep: Click Developer options in Settings.
3rd step: Select USB debugging and choose OK in the pop-up window to confirm allowing USB debugging.
Related Articles:
How to Set Password on HUAWEI Honor 3X
Huawei Android USB Drivers
How to Set Password on HUAWEI Ascend P6/P7
Available link for download
Wednesday, February 1, 2017
Install LibreOffice 5 0 In Ubuntu Or Linux Mint Via PPA
Install LibreOffice 5 0 In Ubuntu Or Linux Mint Via PPA
LibreOffice 5.0 was released last week and it includes numerous changes, such as UI improvements, better HiDPI support, new icon theme by KDE called Breeze, much improved Spreadsheet, better filters for documents and more. For a complete list of changes, see THIS page.

According to the Document Foundation blog, the latest LibreOffice 5.0 is the "cornerstone of the mobile clients on Android and Ubuntu Touch, as well as the upcoming cloud version".
In Ubuntu, Linux Mint and derivatives, the latest LibreOffice 5.0 (Fresh) can be installed either by using a PPA or by downloading and installing the official LibreOffice debs.
Installing LibreOffice via PPA and not by using the official *.deb files is the recommended way of installing/upgrading LibreOffice in Ubuntu (as stated here) because the .deb files provided by The Document Foundation are intentionally built against a very old baseline for maximum compatibility.
Installing LibreOffice via PPA and not by using the official *.deb files is the recommended way of installing/upgrading LibreOffice in Ubuntu (as stated here) because the .deb files provided by The Document Foundation are intentionally built against a very old baseline for maximum compatibility.
Furthermore, by using the PPA, you can automatically get updates as well as easily go back to the LibreOffice version available in the official Ubuntu repositories if for some reason youre not satisfied with the new release, by using PPA Purge.
Below youll find instructions on how to install LibreOffice in Ubuntu or Linux Mint via PPA as well as how to purge the PPA in case you want to go back to the LibreOffice version you were using before adding this PPA.
Install LibreOffice 5.0 in Ubuntu Or Linux Mint via PPA
Important: There are two PPAs you can use to install LibreOffice 5.0 in Ubuntu and Linux Mint: the LibreOffice Fresh PPA which provides the latest stable LibreOffice Fresh (so for instance when LibreOffice 5.1 comes out, this PPA will be updated with LibreOffice 5.1) and the LibreOffice 5.0.x PPA (which Ive used for the instructions below) which only provides LibreOffice 5.0.x updates.
Right now, both PPAs provide the same LibreOffice version. If you prefer to use the LibreOffice Fresh PPA, replace "ppa:libreoffice/libreoffice-5-0" in the commands below with "ppa:libreoffice/ppa".
At the time Im writing this article, the LibreOffice 5.0.x PPA provides LibreOffice 5.0.0 RC5 which is identical to the final release.
Linux Mint 17.2 only: LibreOffice is pinned in Linux Mint 17.2 and cant be upgraded by using a PPA. To be able to update LibreOffice to version 5.0 via PPA, you need to create a file called "libreoffice-libreoffice-5-0.pref" under /etc/apt/preferences.d/ - to do this automatically, use the following command:
gksu gedit /etc/apt/preferences.d/libreoffice-libreoffice-5-0.prefPackage: *
Pin: release o=LP-PPA-libreoffice-libreoffice-5-0
Pin-Priority: 701Then save the file and continue with the instructions below.
To add the LibreOffice 5.0.x PPA and upgrade to the latest LibreOffice 5.0 in Ubuntu 15.04, 14.04 or 12.04 / Linux Mint 17.2 (after following the steps above), 17.1, 17 or 13, use the following commands:
sudo add-apt-repository ppa:libreoffice/libreoffice-5-0
sudo apt-get update
sudo apt-get dist-upgrade
If you want to try the new Breeze LibreOffice icon theme (which you can see in the screenshot above), install it by using the following command:
sudo apt-get install libreoffice-style-breezeHow to revert the changes
If you dont want to continue using LibreOffice 5.0, you can downgrade it to the previous version available in the repositories by using PPA Purge. To do this, firstly install PPA Purge:
sudo apt-get install ppa-purgeThen, purge (this will disable the PPA and downgrade the packages installed from this PPA) the PPA using the following command:
sudo ppa-purge ppa:libreoffice/libreoffice-5-0For Linux Mint, youll have to specify the Ubuntu codename because PPA Purge doesnt officially support it. So for Linux Mint 17, 17.1 and 17.2 which are based on Ubuntu 14.04 Trusty Tahr, use the following command:
sudo ppa-purge -d trusty ppa:libreoffice/libreoffice-5-0Or, for Linux Mint 13 (based on Precise), use:
sudo ppa-purge -d precise ppa:libreoffice/libreoffice-5-0Available link for download
Friday, January 27, 2017
Install MATE 1 14 In Ubuntu MATE 16 04 Xenial Xerus Via PPA
Install MATE 1 14 In Ubuntu MATE 16 04 Xenial Xerus Via PPA
MATE Desktop 1.14 is now available for Ubuntu MATE 16.04 (Xenial Xerus). According to the release announcement, it took about 2 months to release MATE Desktop 1.14 in a PPA because everything has been well tested, so you shouldnt encounter any issues.

The PPA currently provides MATE 1.14.1 (Ubuntu MATE 16.04 ships with MATE 1.12.x by default), which includes changes such as:
- client-side decoration apps now render correctly in all themes;
- touchpad configuration now supports edge and two-finger scrolling independently;
- python extensions in Caja can now be managed separately;
- all three window focus modes are selectable;
- MATE Panel now has the ability to change icon sizes for menubar and menu items;
- volume and Brightness OSD can now be enabled/disabled;
- many other improvements and bug fixes.
MATE 1.14 also includes improved support for GTK+3 across the entire desktop, as well as various other GTK+3 tweaks however, the PPA packages are built with GTK+2 "to ensure compatibility with Ubuntu MATE 16.04 and all the 3rd party MATE applets, plugins and extensions", mentions the Ubuntu MATE blog.
A complete MATE 1.14 changelog can be found HERE.
Upgrade to MATE Desktop 1.14.x in Ubuntu MATE 16.04
To upgrade to the latest MATE Desktop 1.14.x in Ubuntu MATE 16.04 using the official Xenial MATE PPA, open a terminal and use the following commands:
sudo apt-add-repository ppa:ubuntu-mate-dev/xenial-mate
sudo apt update
sudo apt dist-upgrade
Note: mate-netspeed applet will be removed when upgrading. Thats because the applet is now part of the mate-applets package, so its still available.
Once the upgrade finishes, restart your system. Thats it!
How to revert the changes
If youre not satisfied with MATE 1.14, you encountered some bugs, etc., and you want to go back to the MATE version available in the official repositories, you can purge the PPA and downgrade the packages.
To do this, use the following commands:
sudo apt install ppa-purge
sudo ppa-purge ppa:ubuntu-mate-dev/xenial-mate
After all the MATE packages are downgraded, restart the system.
via Ubuntu MATE blog
Available link for download
Wednesday, January 18, 2017
instal JDK in Ubuntu
instal JDK in Ubuntu

untuk menginsatal JDK di ubuntu sangat mudah, hanya dengan menggetikkan perintah pada terminal seperti dibawah ini
sudo apt-get install openjdk-7-jdk- setelah JDK terinstal kemudian kita setting pada file .bashrc agar java dapat terbaca oleh linux, karna file .bashrc defaultnya adalah hidden maka terlebih dahulu file .bashrc di show hidden file dengan cara klik view--> show hidden file (ctrl+H)/.

- kemudian open file .bashrc dengan klik kanan open with gedit
- scrolll ke bagian paling bawah kemudian pastekan alamat dari JDK tersebut seperti :
export JAVA_HOME=/usr/lib/jvm/java-7-openjdk-amd64
export PATH=$PATH:/usr/lib/jvm/java-7-openjdk-amd64/bin

Available link for download
Tuesday, January 17, 2017
Install MATE 1 12 1 In Ubuntu MATE 15 10 Or 16 04 Via PPA
Install MATE 1 12 1 In Ubuntu MATE 15 10 Or 16 04 Via PPA
The Ubuntu 15.10 and 16.04 MATE PPAs were updated recently with the latest MATE 1.12.1.

According to Martin Wimpress, Project Lead for Ubuntu MATE, the PPAs use the same source packages that hes done for Debian, which are currently being reviewed by the FTP masters and should land in Debian Unstable in a couple of weeks, so they should be safe to use.
Among the changes in MATE 1.12 (released about a month ago) are various fixes (for example: panel applets are no longer reordered when changing screen resolutions) and improvements for GTK3, including GTK 3.18 support, better touchpad and multi-monitor support and more. Check out THIS article for a complete MATE 1.12 changelog. I couldnt find a changelog for MATE 1.12.1.
In other Ubuntu MATE news:
- you you shouldnt need the Ubuntu Xenial PPA for long because as soon as the MATE 1.12 packages are accepted into Debian Unstable, they should be automatically imported into Ubuntu 16.04.
- the small MATE Dock applet I wrote about a while back was added to Debian Git recently by Martin Wimpress, and until Ubuntu and Debian reinstate the gir1.2-wnck-1.0 package (which was dropped a while back and is required by this applet), you can install this applet by using the Wily/Xenial Ubuntu MATE PPAs.
Upgrade to MATE 1.12.1 in Ubuntu MATE 15.10 or 16.04
To upgrade to the latest MATE 1.12.1 in Ubuntu 15.10 using the MATE Wily PPA, use the following commands:
sudo add-apt-repository ppa:ubuntu-mate-dev/wily-mate
sudo apt-get update
sudo apt-get upgrade
For Ubuntu 16.04 Xenial Xerus, use the following commands to upgrade to the latest MATE 1.12.1:
sudo add-apt-repository ppa:ubuntu-mate-dev/xenial-mate
sudo apt-get update
sudo apt-get upgrade
For both Wily and Xenial, to install the MATE Dock Applet I mentioned above, use the following command (after upgrading to MATE 1.12.1):
sudo apt-get install mate-dock-appletHow to revert the changes
If for whatever reason you want to downgrade MATE back to the version available in Ubuntu MATE by default, use the following commands:
- for Wily:sudo apt-get install ppa-purge
sudo ppa-purge ppa:ubuntu-mate-dev/wily-matesudo apt-get install ppa-purge
sudo ppa-purge ppa:ubuntu-mate-dev/xenial-mateThe first command installs PPA purge and the second command purges the PPA (disables the PPA and downgrades all the packages installed from that PPA).
Available link for download
Wednesday, January 4, 2017
How To Turn Off Camera Shutter Sound in Galaxy Note 3 Note 2 And Many Other Android Devices
How To Turn Off Camera Shutter Sound in Galaxy Note 3 Note 2 And Many Other Android Devices

In this post I included all the available methods to disable camera shutter sound in Galaxy Note 3 and Note 2. If you have a different android phone try any of the method available in this post. Any of the method may work.
Method 1:
For those users of Galaxy Note 2 and Note 3 which have enabled the option to turn off the camera shutter sound by default.
1. Open your Camera Application.
2. In the camera app, click the Settings softkey.
3. On the next dialog...select settings tab ( third tab )
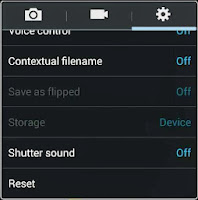
4. Finally Scroll down and tap on Shutter sound to off it.
Method 2 ( Require Root )
This method enables the hidden Shutter sound menu in Galaxy Note 3 and Note 2. You need to root the phone to get it work.
1. Download and install Note 2 Hidden Settings app from Play Store
2. Open the installed app and scroll down to get CAMERA SETTINGS
3. Under camera settings Toggle ON Add shutter sound menu and tap on Apply button.
4. Exit the app...and follow the Method 1.
Method 3
This method uses the app Enforced Stream Silencer to mute the camera shutter sound. This method works with many android devices other than Note 3 and Note 2..try your luck.
1. Download and install Enforced Stream Silencer from here
2. Open the app and check Disable STREAM_SYSTEM_ENFORCED.
3. Finally exit the app...done..
Available link for download
Tuesday, January 3, 2017
How To Sort Apps Grid Alphabetically in TouchWiz UI and Remove The Spaces in It
How To Sort Apps Grid Alphabetically in TouchWiz UI and Remove The Spaces in It

Even i am lover of Holo UI, i am started loving TouchWiz Nature UX from the day i got my Galaxy S3 with Android 4.1.2. The UI improved a lot from the old TouchWiz versions. The only option i miss from the Android stock launcher is the drag and drop uninstall.
Yesterday, when i was surfing through the XDA forum i noticed a thread which asks how to Sort Apps on Touchwiz App Drawer alphabetically. I dont know whether if its possible in the older TouchWiz versions, but it is possible in the current version which i have in my phone. So i just want to share the simple method to sort apps grid in TouchWiz alphabetically without any third party app.
How To Sort Apps Grid Alphabetically in TouchWiz UI and Remove The Spaces in It ?
1. Open the app by clicking Apps in the home screen.2. Click the left soft button and select View type.

3. In the popup dialog select Alphabetical list.

4. Now again click left soft button and select View type.
5. Finally,in the popup dialog select Alphabetical grid.

thats it... now check your TouchWiz app drawer grid it will be sorted in alphabetical order.
Available link for download
Subscribe to:
Posts (Atom)