Sunday, March 26, 2017
How To Take Screenshot in Samsung Galaxy S Duos 2 S7582
How To Take Screenshot in Samsung Galaxy S Duos 2 S7582

Even Galaxy S Duos 2 S7582 is an upgraded version , It has not much improvement over Galaxy S Duos S7562. Some of the improvements of S Duos 2 S7582 over S Duos S7562 are Android 4.2 Jellybean, Dual-core 1.2 GHz CPU, HD Video Recording (1280 x 720 PX), Faster Download Speed 21 Mbps etc.
In this post I included the steps to take screenshot in Galaxy S Duos 2 S7582 without using any third party software. In this latest model too Samsung provides the same key combo which used in the Android Jellybean of Galaxy S4, S3, S2, etc.
Take Screenshot in Galaxy S Duos 2 S7582
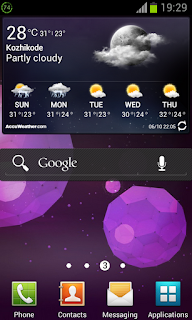
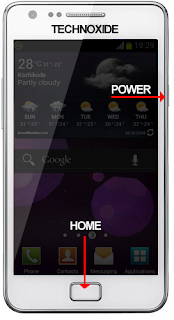
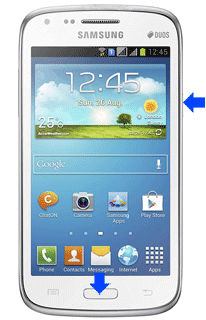
1. Go to the desired screen you want to capture.2. Then, Simultaneously press and hold the Power and Home button for 2-3 seconds.
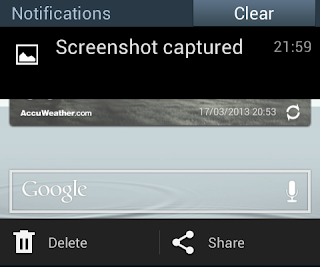
Thats... You will hear a capture sound...if its success.
To get the captured picture Go to
Gallery -> Screenshots
Or
Go to /storage/sdcard0/Pictures/Screenshots
using any file manager.
Available link for download
Friday, March 24, 2017
How To Take Screen Shot in Galaxy Core Prime SM G360H
How To Take Screen Shot in Galaxy Core Prime SM G360H
 Yesterday I bought a new Galaxy Core Prime priced 9,000 INR in India. For the price tag you will get a 5 MP camera, 1.2 GH Quad Core processor, 1 GB RAM, Android Kitkat 4.4.4 etc. After using a day I feel the device has better performance, decent battery life. I wish the Auto brightness feature should be there, but, no. In this post I include the available screen capture methods in Galaxy Core Prime.
Here is the simple and common method to take screenshot on Galaxy Core Prime. Like some other Galaxy devices Galaxy Core Prime does not have an option to screen shot using palm swipe. Here is the key combo method to screen capture Galaxy Core Prime.
How To Take Screen Shot in Galaxy Core Prime SM-G360H?
1. Go to the desired screen you want to take a screenshot.2. Now, simultaneously press and hold the Power and Home button for 2-3 seconds.

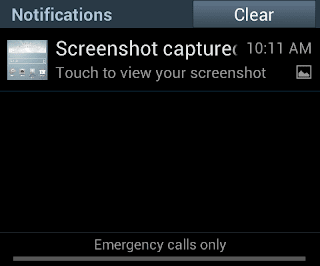
Thats it... both of the method above tested and works great.
To get the captured picture Go to Gallery -> Screenshots
Or
Go to /storage/Pictures/Screenshots using any file manager.
Available link for download
Tuesday, February 7, 2017
How To Take Photosphere Photos in Android Stock Camera
How To Take Photosphere Photos in Android Stock Camera

May be because of that, yesterday Google released a tutorial on taking and sharing photosphere image on Google maps. The tutorial gives a clear idea on taking photosphere images using Android stock camera.In this post i am shared official photosphere tutorial video by Google, just check it out.
Available link for download
Saturday, February 4, 2017
How To Take Screen Shot in Galaxy S2 4 0 4 Stock ROM
How To Take Screen Shot in Galaxy S2 4 0 4 Stock ROM
Follow the simple steps to take screen shot in Galaxy S2 Stock 4.0.4 ROM.
Steps
1. Go to the screen you want to capture.
2. Simultaneously press and hold the Home Button + Power Button for 2 seconds.
Thats it. You will hear a capture sound and a Toast message. To get the captured image go to /sdcard/Pictures/Screenshots.
.
Available link for download
Monday, January 23, 2017
How To Take Ephedrine To Lose Weight Bodybuilding 101
How To Take Ephedrine To Lose Weight Bodybuilding 101

How To Take Ephedrine To Lose Weight : Bodybuilding is a fairly good pastime for people of any agehen you are young youll not even comprehend what you are doing in your efairlyday Well-liked or specific exercise activity is considered bodybuildings you get older bodybuilding may possibly be something you do less for fun and more for the preservation of your health and appearanceou may ask what types of bodybuilding activities you can do at home, at the gym, or in the great outdoorshe significant to successfully maintain an exercise method is to find activities that you are interested in without having the knowledge you are exercising, character building, and bodybuildings adults kayaking, swimming, and diving are activities in or near water that can build bodiesennis, softball, and skating can be fun bodybuilding activitieseens participate in activities during schoolypically teens will walk more than an adults will just by the sheer fact the malls are bigger than everhe activity that you choose or ... [Read More - How To Take Ephedrine To Lose Weight]
Nowadays The Easiest Way to Shed Weight is among the many hunted product or service with Usa. The product quality will be great. Quite a few Critiques offers show the idea this stuff features highest quality, therefore most of the customers are fulfilled. It is possible to study the item coming from buyer reviews with granted good replies. If you are interested on this many desired available item, you must acquire shortly avoiding disappointment, trigger this product does sold-out prematurely.

The Easiest Way to Shed Weight


The Easiest Way to Shed Weight How To Take Ephedrine To Lose Weight > Hi Brad, With "Consume Quit Consume" I was ready to completely overhaul my complete diet regime (consuming complete food items, lean meats and restricted processed food items), as nicely as consume smaller portion sizes and how to tell when I wasnt hungry any longer. I also discovered specific foods that irritated my stomach and was in a position to get rid of them, and now come to feel physically far better than I ever have. When I perform out, I never feel weak or drained. My vitality level and power has not decreased and my workout routines are just as very good if not much better than prior to (I can now do broad grip pull ups). "Eat Stop Consume" helped me to throw out my negative routines and my addiction to consuming and above eating, and adopt a genuine balanced diet I in no way considered I would be in a position to do. Thanks for all of the work and insight Chad Fenwick, PhD (Candidate)
These days The Easiest Way to Shed Weight is one of the almost all hunted solution at United states. This product top quality is actually good. Numerous Testimonials has demonstrate this these items has top quality, and so the vast majority of purchasers tend to be pleased. It is possible to read this through buyer opinions whove given positive responses. If you are interested with this particular the majority of desired on discount sales object, you need to acquire quickly in order to avoid dissatisfaction, bring about this product does out of stock too quickly.

Possibly You Want To Read About :


Get Video of How To Take Ephedrine To Lose Weight

Popular Search : how to take ephedrine to lose weight
Available link for download
Tuesday, January 10, 2017
How to Take Full Backup of Your Android Device
How to Take Full Backup of Your Android Device
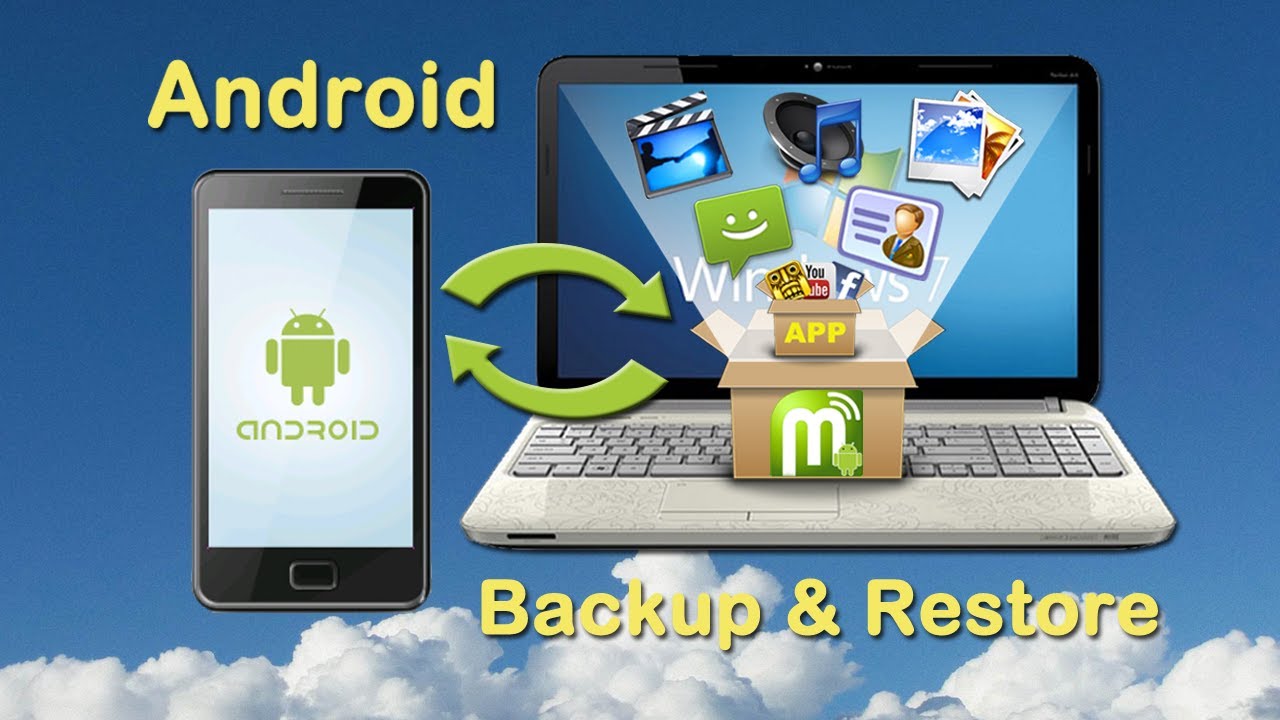
Backup your Android Device Data with Titanium Backup (Requires Root)
- Backup your apps and data (including system apps).
- Restore your apps and data (including system apps).
- Scheduled Backups.
- Move apps to/from SD Card.
- Backup and Restore SMS, Call logs and Wi-Fi settings.
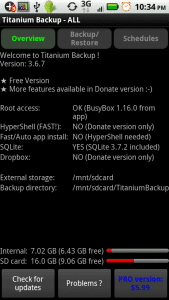
Take your 1st backup with Titanium Backup
- Download the Titanium Backup app from Play Store or from the link given above.
- After the app is installed, launch the Titanium Backup app.
- Click on the Backup/Restore option.
 Backup and Restore
 - Now, tap the “menu” button on your device.
- A menu will be popped up. From there, select “Batch”.
- In the batch menu, select “Backup all user apps+system data”.
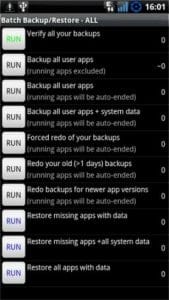 Backup User Apps+System Data
 - You will be asked whether to kill the running apps or not. Select “Kill active apps”.
- Now click “Run the batch operation”.
- The backup will be done and will be stored in your SD card in the directory “TitaniumBackup”.
Restore your Backup with Titanium Backup
- Open the Titanium Backup app.
- Click on Backup/Restore option.
- Tap the “menu” button on your device.
- A menu will be popped up. From that menu, select “Batch”.
- In the batch menu, select “Restore all apps with data”.
- The backup will now be restored and your device will look like the day when you made the backup.
Backup your Android Device Data with Helium Backup (No Root Required)
- Backup your data to SD card.
- Restore your data from SD card.
- Backup your data to PC.
- Restore your data from PC.
Backup your data with Helium App
- Download the Helium app from Play Store or from the link on your Android device.
- Open the Helium app on your Android device.
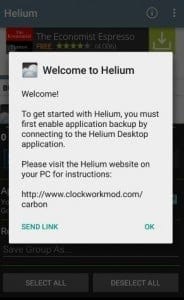 Helium – App Sync and Backup
 - When you will open the app, the app will ask your access to your Google account to backup data on Google Drive. Grant the access to Helium app.
- Now, Helium app will prompt you to connect your Android device to PC so as to connect to the Helium desktop application.
- Connect your device to PC with USB Cable.
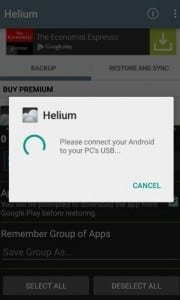 Helium App
 - Now, install Helium for chrome by clicking here.
- Now, open Helium app on both your PC and your Android device.
- Helium app will now pair both the devices.
- You can disconnect your Android device now.
- Now, on your Android device tap the “Backup” button in the Helium app.
- Helium app will now ask where you would like to save the backup. Select “Google Drive” if you want to access the backup on different devices.
Nandroid Backup
- All Apps
- All Images
- All Videos
- All Music
- All Games
- All Text messages
- All Multimedia messages
- All Wallpapers
- All Widgets
- All Stored passwords (Wi-Fi passwords included)
- All Ringtones
- Your Stock ROM
- All Accounts
- All System Settings
- Try different ROM’s.
- Protect yourself against accidently loaded malware.
- You can use this NANDroid Backup on any device of the same model so if you have lost your phone and got a replacement for the same, then install the backup and your Android device will be as good as before.
Sunday, December 25, 2016
How To Take Screenshot in Galaxy S3 Galaxy S4 and Galaxy Note 2
How To Take Screenshot in Galaxy S3 Galaxy S4 and Galaxy Note 2
In this post i am included the simple two methods to take screenshot in Samsung Galaxy S2, Galaxy S4 and Galaxy Note 2. The methods includes the common key combination and the Palm swipe method.
How To Take Screenshot in Galaxy S3, Galaxy S4 and Galaxy Note 2 ?
Method 1 ( Key combo method )
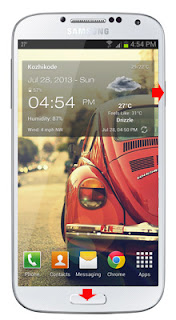
1. Go to the desired screen you want to capture.
2. Now , simultaneously press and hold the Power and Home button for 2-3 seconds.
thats it..on success capture you will see Saving screenshot... notification with capture sound.
Method 2 ( Palm Swipe Method )
1. Go to Settings -> Motion ( Enable it if not enabled )
2. In Motion check Palm swipe to capture.
3. Now go to the desired screen you want to capture.
4. Finally Swipe your parm from right to left or left to right.
thats it... on success capture you will see a capturing effect on the screen with capture sound.
To get the captured picture Go to Gallery -> Screenshots Or Go to /storage/sdcard0/Pictures/Screenshots using any file manager.
Available link for download
Friday, December 23, 2016
How To Take Screenshot in Galaxy Grand Duos I9082
How To Take Screenshot in Galaxy Grand Duos I9082
Update:
I was forget to include the Palm swipe method. Thanks Bayu Widyasanyata for mentioning it. Now the post updated with common Key combo and Palm swipe method.
How Take Screen Shot in Galaxy Grand Duos I9082 ?
Method 1 ( Key Combo Method )
1. Go to the desired screen you want to capture.
2. Now , simultaneously press and hold the Power and Home button for 2-3 seconds.
Method 2 ( Palm Swipe Method )
1. Go to Settings -> Motion ( Enable it if not enabled )
2. In Motion check Palm swipe to capture.
3. Now go to the desired screen you want to capture.
4. Finally Swipe your parm from right to left or left to right.
Thats it... both of the method above tested and works great.
To get the captured picture Go to Gallery -> Screenshots Or Go to /storage/sdcard0/Pictures/Screenshots using any file manager.
Available link for download
Tuesday, December 6, 2016
How To Take A Screenshot in Samsung Galaxy S2 I9100
How To Take A Screenshot in Samsung Galaxy S2 I9100

Taking screen shot in Samsung Galaxy S2 is very easy. No application needed to capture the screen.
How To:
1. Press and Hold down the HOME button and then press the POWER button immediately before launching the recent apps window.
- You should hear a sound of a screenshot being taken and you should see a text that shows it has been captured and saved.
Done !! Now navigate to /sdcard/ScreenCapture or open galary to get the captured screen.
Tested This method, Works great with ofiicial Rom ( Android 2.3+ ) and not works with Resurrection Remix ics v1.3 Rom.
Available link for download
Monday, November 28, 2016
How To Take Screenshot in Galaxy Core Duos GT I8262
How To Take Screenshot in Galaxy Core Duos GT I8262
In this post i included the steps to capture screenshot in Galaxy Core GT-I8262 without using any third party app. We can take the screenshot of Galaxy Core duos using the same key combo uses in other Galaxy devices like Galaxy S3,Galaxy S4,Note 2, etc.
Samsung Galaxy Core Duos GT-I8262 Screenshot
1. Go to the screen you want to capture.2. Now , Press and hold the Power and Home button for 2-3 seconds.
Thats it...On successful capture you will hear a capture sound and will see a white border animation in the screen.
To get the captured picture
Go to Gallery -> Screenshots
Or
Go to /storage/sdcard0/Pictures/Screenshots using any file manager.
Available link for download
Thursday, November 10, 2016
How to take screenshot in Galaxy S plus
How to take screenshot in Galaxy S plus

Method 1:
1. Go to the screen which you desire to take Screenshot.
2. Press and hold the Back soft key.
3. Now press the Home button in the middle.
Method 2:
1. Go to the screen which you desire to take Screenshot.
2. Simultaneously Press the Back soft key and Home button in the middle.
Thats it. You will hear a capture sound and a Toast message will appear as Screen captured. Saved as image file. To get the captured image go to /mnt/sdcard/ScreenCapture.
Available link for download
Wednesday, November 2, 2016
How to take screenshot in Android v4 ics ice cream sandwich
How to take screenshot in Android v4 ics ice cream sandwich

Taking screen shot in Android 4.0+ is simple when compared with other android versions. While capturing the animation makes it more fun. I am not sure whether this method works with all android 4.0+ versions, i am tested the method with Galaxy S2 and Nexus S and works great.
Method:
1. Press the volume down button and power button simultaneously for one second,then you will hear a capture sound with animation.
Thats it ! Browse to /sdcard/Pictures/Screenshots for captured images.
Available link for download
Sunday, October 16, 2016
How To Take Screenshot in Xiaomi Redmi 2 And Other MI Devices
How To Take Screenshot in Xiaomi Redmi 2 And Other MI Devices
 Yesterday, I wrote about rooting Xiaomi Redmi 2 and here I am writing about the built in method to take screenshot in Xiaomi Redmi 2 and other mi devices. In Xiaomi devices, there are two methods available to capture the screen. Notification drawer toggle and Key combination method.
Xiaomi Redmi 2 Screenshot Using Notification drawer button
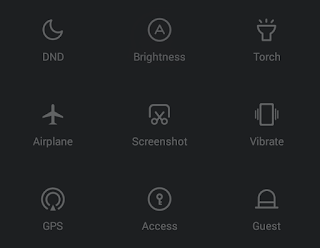
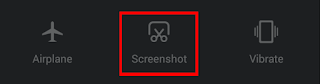
1. Go to the desired screen you wish to capture.2. Swipe down Notification drawer and scroll down until you reach Screenshot button.
3. Now tap on the Screenshot button.
Xiaomi Redmi 2 Screenshot Using Key Combination Method
1. Go to the desired screen you wish to capture.2. Press and hold Volume down and Power button together for 2-3 seconds.
Thats it.. To get the captured screen shot Go to Gallery -> Screenshots Or Go to DCIM/Screenshots using any file manager.
Available link for download