Showing posts with label device. Show all posts

Saturday, March 4, 2017

Intel USB Drivers for Android Device

Intel USB Drivers for Android Device


In this text, you can learn about three latest Intel USB drivers and choose one for your Intel Android phone whenever it is needed.


1. Intel Android USB Driver 1.1.4

Size: 8.8 MB 

Applicable model: Android device with Intel Atom Processor

Operatingsystem: Windows XP, Windows 7 (32/64-bit), Windows 8 (32/64-bit) and Windows Vista (32/64-bit)


2. Intel Android USB Driver 1.1.5


Size: 8.8 MB 

Matched model: Android device with Intel Z2460 Processor

Support system: Windows XP, Windows 7 (32/64-bit), Windows 8 (32/64-bit) and Windows Vista (32/64-bit)

Other information: It is for Android App Developer usage.


Tips: The above two drivers can be downloaded from the following website.

http://drivers.softpedia.com/get/MOBILES/Intel/


3. Intel(R)_USB_3.0_eXtensible_Host_Controller_Driver.zip (Version:

1.0.10.255)


3.1 Driver Description

Size: 5.22 MB

Applicable models: Android devices with Intel Core Processor and Intel 7 Series/C216 Chipset Family

Operating system: Windows 7 (32/64-bit) and Windows Server 2008 R2 (64-bit)


3.2 Download Link

https://downloadcenter.intel.com/Detail_Desc.aspx?DwnldID=21129


Available link for download

Read more »

Thursday, February 23, 2017

Intel Chipset Device Software 10 0 24 Free Download

Intel Chipset Device Software 10 0 24 Free Download


Intel Chipset Device Software 10.0.24 Free Download


Intel Chipset Device Software, provides information to the operating system of the proper setup chipset for use of certain features, such as AGP, USB, basic support for PCI and ISA PnP. Installing the drivers related to the chipset (such as the graphics driver, the IDE bus, etc.) is possible only if the operating system is fully recognize this chipset. This Software Also Offers A set of command line flags, Which Provide Additional Installation choices

The Intel(R) Chipset Device Software installs Windows* INF files to the target system. These files outline to the operating system how to configure the Intel(R) chipset components in order to ensure that the following features function properly:

- Core PCI and ISAPNP Services
- PCIe Support
- IDE/ATA33/ATA66/ATA100 Storage Support
- SATA Storage Support
- USB Support
- Identification of Intel(R) Chipset Components in
the Device Manager

Support processor:
- Intel® Atom™/Celeron®/Pentium® Processor
- Intel® Core™ M processor family
- 5th Generation Intel® Core™ processor family
- 4th Generation Intel® Core™ processor family
- 3rd Generation Intel® Core™ processor family
- 2nd Generation Intel® Core™ processor family
- Intel® 9 series chipset -Wellsburg -Patsburg

SYSTEM REQUIREMENTS
Microsoft Windows 7
Microsoft Windows 7 x64
Microsoft Windows Server 2008 R2
Microsoft Windows Server 2008 R2 x64
Microsoft Windows 8
Microsoft Windows 8 x64
Microsoft Windows Server 2012
Microsoft Windows Server 2012 x64
Microsoft Windows 8.1
Microsoft Windows 8.1 x64
Microsoft Windows Server 2012 R2
Microsoft Windows Server 2012 R2 x64
Microsoft Windows 10 x64

Download from Homepage


Available link for download

Read more »

Thursday, February 9, 2017

How To Stream Audio To A Chromecast Or DLNA UPnP Device From Linux Using pulseaudio dnla

How To Stream Audio To A Chromecast Or DLNA UPnP Device From Linux Using pulseaudio dnla


pulseaudio-dlna is a lightweight streaming server that makes it easy to stream audio from a Linux computer that uses PulseAudio, to a DLNA / UPnP or Chromecast device in the same network.

The tool discovers all UPnP / DLNA / Chromecast renderers in the network and adds them as sinks to PulseAudio. You can then either select the sinks from the sound settings, or use pavucontrol to control which applications can stream to the UPnP / DLNA or Chromecast device. 

Lets get started with installing and using pulseaudio-dlna.

For Ubuntu 16.04, 15.10 and 14.04, Linux Mint 17.x and derivatives, pulseaudio-dlna can be installed from a PPA. To add the PPA and install pluseaudio-dlna, use the following commands:
sudo add-apt-repository ppa:qos/pulseaudio-dlna
sudo apt-get update
sudo apt-get install pulseaudio-dlna

For how to install it in other Linux distributions, see the pulseaudio-dnla instructions.

Now, to run it, type the following in a terminal:
pulseaudio-dlna

On the other end, make sure the DLNA / UPnP or Chromecast device is powered on.

Next, open the system sound settings. In Ubuntu (Unity), from the Sound Menu, select Sound Settings and your DLNA / UPnP and/or Chromecast device should show up in the output list:


Select the device you want to stream to and... thats it (well, for DLNA / UPnP devices, you may need to accept the connection - a popup should be displayed on the device screen; Chromecast should start streaming immediately).

In my test under Ubuntu 16.04, the sound was perfect while using the default pulseaudio-dlna settings however, the sound was distorted when streaming to a Chromecast. To get it to work properly, I ran pulseaudio-dlna with mp3 as the codec and ffmpeg as the encoder backend:
pulseaudio-dlna --codec mp3 --encoder-backend=ffmpeg

Of course, this was the case for me, and it might not be needed in other cases. Update: pulseaudio-dlna was updated and mp3 is now prioritized over flac for Chromecasts.

Note: to be able to use ffmpeg as the encoder backend, youll need to install it. Its available in the official Ubuntu 15.10 and 16.04 repositories (so to install it, use: "sudo apt-get install ffmpeg") however, its not for Ubuntu 14.04.

For Ubuntu 14.04, you can search for a PPA that provides ffmpeg (use e.g. Y PPA Manager to search in Launchpad PPAs) - heres one that has ffmpeg backported from a newer Ubuntu version, but note that I didnt test it -, or install it from source.

pulseaudio-dlna allows changing the server port, force auto reconnect, set the cover mode (whats displayed on the DLNA / Chromecast device) and much more. To see all the available pulseaudio-dlna options, type:
pulseaudio-dlna --help

If you want to send single audio streams to the device, you can use pavucontrol. To install it in Ubuntu, use the following command:
sudo apt-get install pavucontrol

Then launch pavucontrol (it shows up as PulseAudio Volume Control in the menu / Dash) and on the Playback tab, change the stream to the DNLA / Chromecast device, only for the apps you want to use for streaming. As an example, heres Audacious set to stream to a Chromecast device:


For more information about pulseaudio-dlna, bug reports, etc., see its GitHub page.


Available link for download

Read more »

Tuesday, January 10, 2017

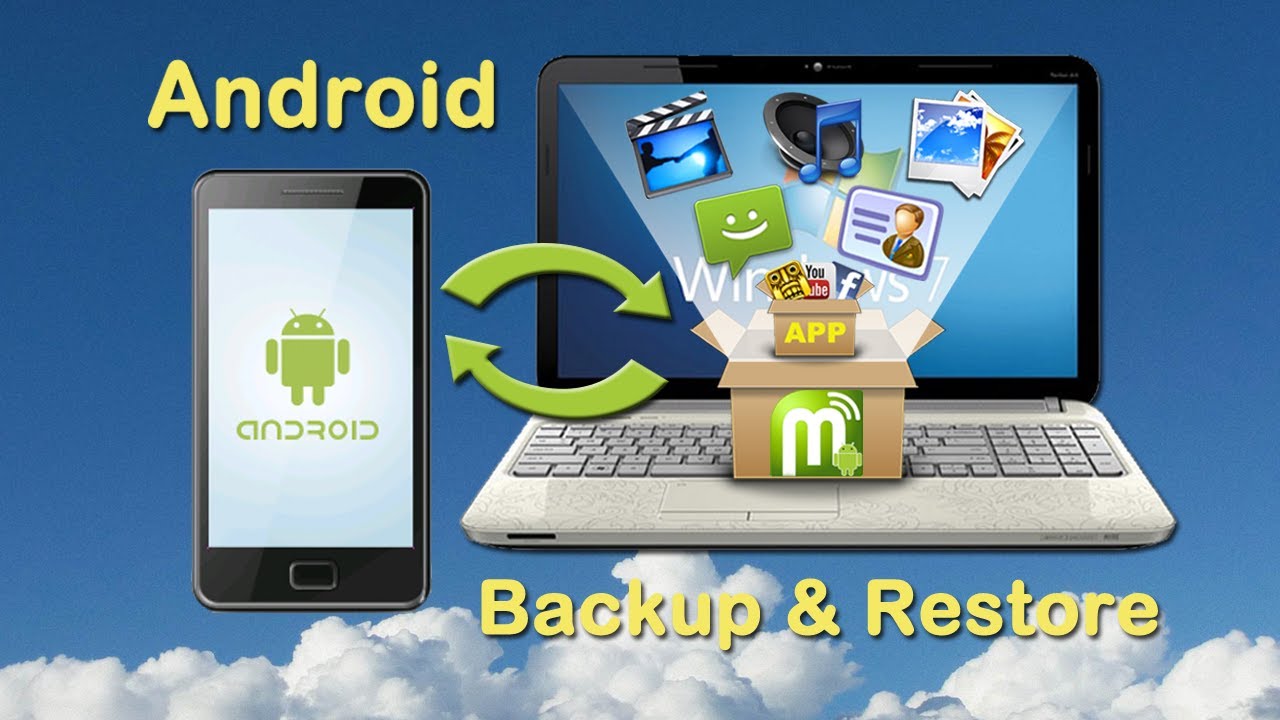
How to Take Full Backup of Your Android Device

How to Take Full Backup of Your Android Device


maxresdefault.jpg (1280×720)


How to Take Full Backup of Your Android Device


Android, which accounts for over 84% of total smartphone market in the world is one of the most awesome things developed by google. The main reason why people go for Android over other operating system is Android allows you to optimize apps, kernel, ROM’s and mods and gives you freedom which other operating system don’t. Android is actually based on Linux operating system so it has endless possibilities. And if you will root your Android device, then you will get a whole new world of customization, trying different custom ROM’s and Kernels. Android even allows you to add multiple operating systems in a single device.
Now, while trying different custom ROM’s, kernels and mods there is a slight chance that you may lose your data. This may result in loss of Apps, images, personal data and sometimes even ROM. And if you lose your ROM, then there is a very slight chance hat you will be able to use your Android device again. So now you may be thinking what precaution you should take before trying different custom ROM’s. The ultimate solution for this is to take a full backup of your Android device and store it on SD card and your PC.
In this tutorial, we will help you through the procedure of taking backup of your apps, images, data and even your ROM and everything else that resides in an Android device except for your SD card. The backup of your Android device will be stored on your SD card and you can even copy that backup file to a more secure place like your PC. We will make a Nandroid Backup of your android device. Nandroid Backup takes a full backup image of your device and stores it so it can restore your Android device when something happens.
We will also suggest you some apps to backup your existing apps, images, videos and texts for both rooted and unrooted Android devices.

Backup your Android Device Data with Titanium Backup (Requires Root)

If you are one of those who want to take a complete backup of your Android device excluding ROM and you have no problem in rooting your device then Titanium Backup app is the best solution for you. Titanium Backup app requires root and this app is available in Play Store free of cost. With Titanium Backup you can:
  1. Backup your apps and data (including system apps).
  2. Restore your apps and data (including system apps).
  3. Scheduled Backups.
  4. Move apps to/from SD Card.
  5. Backup and Restore SMS, Call logs and Wi-Fi settings.
Download Titanium Backup App

Take your 1st backup with Titanium Backup

Follow the below steps to backup the data present in your Android device:
  1. Download the Titanium Backup app from Play Store or from the link given above.
  2. After the app is installed, launch the Titanium Backup app.
  3. Click on the Backup/Restore option.
    Backup and Restore
    Backup and Restore
  4. Now, tap the “menu” button on your device.
  5. A menu will be popped up. From there, select “Batch”.
  6. In the batch menu, select “Backup all user apps+system data”.
    Backup User Apps+System Data
    Backup User Apps+System Data
  7. You will be asked whether to kill the running apps or not. Select “Kill active apps”.
  8. Now click “Run the batch operation”.
  9. The backup will be done and will be stored in your SD card in the directory “TitaniumBackup”.

Restore your Backup with Titanium Backup

Follow the below steps to restore your backup with Titanium Backup app:
  1. Open the Titanium Backup app.
  2. Click on Backup/Restore option.
  3. Tap the “menu” button on your device.
  4. A menu will be popped up. From that menu, select “Batch”.
  5. In the batch menu, select “Restore all apps with data”.
  6. The backup will now be restored and your device will look like the day when you made the backup.
The only thing which some may constrain some users from taking the backup with Titanium Backup app is that the Titanium Backup requires root. So, in the next section of our tutorial, we will suggest you an app to take backup of your Android device without the need of rooting your device.

Backup your Android Device Data with Helium Backup (No Root Required)

Helium-App Sync and Backup is one app which you should use to backup your Android device if you don’t want to root your device. Helium App backups everything ranging from your call logs to videos, apps and data. The only thing which cannot be backed up by Helium app is your ROM. Some of the features of Helium app are:
  1. Backup your data to SD card.
  2. Restore your data from SD card.
  3. Backup your data to PC.
  4. Restore your data from PC.
Download Helium-App Sync and Backup

Backup your data with Helium App

  1. Download the Helium app from Play Store or from the link on your Android device.
  2. Open the Helium app on your Android device.
    Helium - App Sync and Backup
    Helium – App Sync and Backup
  3. When you will open the app, the app will ask your access to your Google account to backup data on Google Drive. Grant the access to Helium app.
  4. Now, Helium app will prompt you to connect your Android device to PC so as to connect to the Helium desktop application.
  5. Connect your device to PC with USB Cable.
    Helium App
    Helium App
  6. Now, install Helium for chrome by clicking here.
  7. Now, open Helium app on both your PC and your Android device.
  8. Helium app will now pair both the devices.
  9. You can disconnect your Android device now.
  10. Now, on your Android device tap the “Backup” button in the Helium app.
  11. Helium app will now ask where you would like to save the backup. Select “Google Drive” if you want to access the backup on different devices.
Note: You will have to pair your Helium Android app and Helium chrome application each time after you reboot your device. Also, in the step-5 if you face any problem while connecting and pairing your device to PC, then select the “Enable PTP” button in the Helium app and in the next screen choose the “Camera (PTP)” option. This will resolve your any connecting and pairing issue.
Till now, we have described 2 apps which can take a backup of your Android device. However, both the apps miss one common feature. We can’t take the backup of the ROM through both of these apps. To take the backup of the ROM, you need to take a Nandroid Backup of your Android device. Below if the procedure to do so.

Nandroid Backup

Nandroid is sometimes also written as NANDroid. It is a permanent storage memory of your android device. A Nandroid Backup is a standard directory image for backing up a perfect mirror image of your Android device. With the help of Nandroid Backup, you can save:
  1. All Apps
  2. All Images
  3. All Videos
  4. All Music
  5. All Games
  6. All Text messages
  7. All Multimedia messages
  8. All Wallpapers
  9. All Widgets
  10. All Stored passwords (Wi-Fi passwords included)
  11. All Ringtones
  12. Your Stock ROM
  13. All Accounts
  14. All System Settings
And pretty much everything!
After taking a Nandroid Backup, you can:
  • Try different ROM’s.
  • Protect yourself against accidently loaded malware.
  • You can use this NANDroid Backup on any device of the same model so if you have lost your phone and got a replacement for the same, then install the backup and your Android device will be as good as before.
Available link for download

Read more »

Wednesday, December 21, 2016

How to Unlock ByPass a Pattern Lock on an Android Device Without Loosing Data

How to Unlock ByPass a Pattern Lock on an Android Device Without Loosing Data


So you are here cuz you probably have had set a Pattern lock on your android device, and baaah BAD LUCK you forgot the the pattern. So just rather than getting a whole factory reset of your devise we have a very easy and nice tutorial to get your Phone unlocked while not even loosing a single contact out of your Phone.
Well many other are here cuz they want to spy on a friends android device but damn th pattern lock is not letting them. So chill out and Spy tight as we have a set of instruction and a very nice post on Unlocking a Friends android Pattern lock.
Hello friends today we are here to help you about how to bypass the pattern lock on an android device. Have you sometime suffered with Locked out? Do you know how to bypass the pattern lock? Did you try it out on your own anytime?
Pattern lock on an android device provides users a great security which further prevents your smartphone with any accidental taps like theft or misuse. If a user wants to use this security feature on their android device then they have to customize it under the settings option in menu.
It happens that sometimes users forget the pattern of lock of their devices and in panic they start guessing the pattern and finally comes with a problem of locked out. Users and dear users don’t be so panic as if is facing any problem there is a definite solution to that problem as well. If you face a locked out then you can bypass the pattern lock.
There is very commonly used method to bypass android pattern lock which you have forgotten bu that will for sure make you loose all your data and all your contacts and everything. in other words it will make the phone a device the same as your bought with everything wiped off including all applications. This can be dony by going into the recovery mode of any android device. and then select factory reset option. This is not recommended as for 2 reasons, first, It will clear all your data, second, we have a better option left with us !
You don’t know how to bypass the pattern lock. No worries at all. We will help you out and you just need to follow some ADB commands and then you can finally bypass the pattern lock on anandroid device. Just go through the following guide tutorial very carefully step-by-step so as to bypass the pattern lock.

SOME BASIC STEPS BEFORE YOU BEGIN Unlock & ByPass a Pattern Lock on an Android Device Without Loosing Data

  • The very first and important need is the ADB drivers that must be installed in your PC.
  • Then it is really important that the USB debugging must be enabled before your device being locked.
  • You should be very carefull while installing the drivers of your device. This technique will not work without installing the specific drivers.
Users might feel really annoyed and irritated when they tried the pattern lock several times in panic and unfortunately their android smartphone displayed locked out. Further users cannot access their android smartphone and at last need to bypass the pattern lock.

HOW TO BYPASS THE PATTERN LOCK ON AN ANDROID DEVICE

Just Follow the easy tutorial to Unlock an android’s pattern lock without factory reset after when you have forgotten it. And yes its that easy as it sounds.

  • Users need to connect their android device via USB cable to PC.
  • You must now open the folder where you installed ADB driver.
  • Now you just have to click right on the screen’s blank area along with hold the shift key and select “OPEN COMMAND WINDOW”.
    How to Unlock & ByPass a Pattern Lock on an Android Device Without Loosing Data
  • A window command will prompt and then you just need to type the following:
    adb shell
    cd /data/data/com.android.providers.settings/databases
    sqlite3 settings.db
    update system set value=0 where name=lock_pattern_autolock;
    update system set value=0 where name=lockscreen.lockedoutpermanently;
    .quit
  • Once it has been done then you have to reboot your android device.
  • Now it is all done and set.
After following this guide tutorial now you can access your android device as the pattern lock has been completely disabled.
There is another method not to bypass the lock pattern on and android device but to get your device being unlocked. It is through G MAIL. When you face problem of locked out just click on forgot pattern and follow the basic instructions that follow.
If this guide tutorial really helped you out then please share your experiences with us. And if still any problem persists you can ask for our help and we are there to help you out.
That was it now you can easily unlock any of your friends Phone without even letting him know and making use of it for your propose. But ill not recommend this as the so called friend of yours may punch punch back in your face.
So anything not working with the post or anything you are confused with, just let us know in the comment section below or contact us from the top menu.


Available link for download

Read more »

Sunday, November 27, 2016

How to THEME u r Android DEVICE without Custom Rom

How to THEME u r Android DEVICE without Custom Rom


Okey People NOW you can THEME your ANDROID device just by simple ROOTING.


1. Download and install Xposed framework HERE.or DIRECT DOWNLOAD
 (Latest Xposed Framework V 2.3.1 UUpdate after installing))
2. Download and install Xtheme engine Here.or Direct Download
3 .Download and install(In Internal Memory) any theme from HERE
4. Open Xposed installer click "Install/Update".

5. Click "Modules" Tab and enable "XThemeEngine".

6. Click XThemeEngine and select "Choose theme".

7. Choose "Any Theme" and "click apply theme".
8. Soft reboot.
Enjoy.!!!


Available link for download

Read more »

Tuesday, November 22, 2016

Intel Chipset Device Software 10 0 26

Intel Chipset Device Software 10 0 26


Intel Chipset Device Software 10.0.26

Intel Chipset Device Software 10.0.26


Intel Chipset Device Software, provides information to the operating system of the proper setup chipset for use of certain features, such as AGP, USB, basic support for PCI and ISA PnP. Installing the drivers related to the chipset (such as the graphics driver, the IDE bus, etc.) is possible only if the operating system is fully recognize this chipset. This Software Also Offers A set of command line flags, Which Provide Additional Installation choices 

The Intel(R) Chipset Device Software installs Windows* INF files to the target system. These files outline to the operating system how to configure the Intel(R) chipset components in order to ensure that the following features function properly:

- Core PCI and ISAPNP Services
- PCIe Support
- IDE/ATA33/ATA66/ATA100 Storage Support
- SATA Storage Support
- USB Support
- Identification of Intel(R) Chipset Components in
the Device Manager

Support processor:
- Intel® Atom™/Celeron®/Pentium® Processor
- Intel® Core™ M processor family
- 5th Generation Intel® Core™ processor family
- 4th Generation Intel® Core™ processor family
- 3rd Generation Intel® Core™ processor family
- 2nd Generation Intel® Core™ processor family
- Intel® 9 series chipset -Wellsburg -Patsburg

SYSTEM REQUIREMENTS

Microsoft Windows 7
Microsoft Windows 7 x64
Microsoft Windows Server 2008 R2
Microsoft Windows Server 2008 R2 x64
Microsoft Windows 8
Microsoft Windows 8 x64
Microsoft Windows Server 2012
Microsoft Windows Server 2012 x64
Microsoft Windows 8.1
Microsoft Windows 8.1 x64
Microsoft Windows Server 2012 R2
Microsoft Windows Server 2012 R2 x64
Microsoft Windows 10 x64


Whats New:

Slovak language support.

Added support for Microsoft Windows Server Threshold x64.

Added YBR for LPSS devices on Microsoft Windows Server 2012 R2 x64 and later.

Moved device 9D31 from Chipset_thermal.inf to Chipset_system.inf

Added Intel® Atom™/Celeron®/Pentium® Processor (BSW) official brandings.

Added Intel® Xeon® Processor D-1500 product family devices 6F0D, 6F0E.

“freshinstall” behavior added to MUP.xml.


 Download from homepage


Available link for download

Read more »

Sunday, November 6, 2016

Install ClockworkMOD CWM Recovery in all MediaTek Android Device Working 100

Install ClockworkMOD CWM Recovery in all MediaTek Android Device Working 100


Install ClockworkMOD (CWM) Recovery in all MediaTek Android Device Working 100%


No Custom recovery for your device? As Mediatek smartphone chipsets have gained its popularity in the market not only due to its performance but also for its affordability, many users tend to buy these smartphones. However, most MediaTek devices nowadays are produced locally. The problem is the limits bound to these devices when it comes to tweaking such as rooting, installing custom recoveries and more, due to lack of developers for their device. But no worry there are many ways to get things done.Today I’m sharing this method of installing ClockworkMOD which works for all Mediatek device. We will use MTK Droid Tools for the process.

Note : This works only for MTK based android device. If you are trying this on any other device then do it at your own risk. I am not responsible if you brick your phone or if u make any other damage to your phone


Things you need:

  1. A MediaTek android device (MT65XX)
  2. Your phone must be rooted already.
  3. USB Chord.
  4. Windows PC/Laptop.
  5. Download ADB Drivers : ADB Drivers.
  6. Download MTK Droid Tools for Windows : MTK Droid Tools for Windows. [It has no virus as its an .exe files, Google drive always warns users before downloading .exe file.]

How To Flash ClockworkMod (CWM) Recovery on Any MediaTek (MT65xx) Android Device :

1. Download necessary files from above links.
2. Install the downloaded PDANet to your computer. It contains ADB Drivers.
3. Turn on your android device and connect it to your computer using USB Chord. (Make sure to Enable USB Debugging, go to Phone Settings — Developer Options — Enable USB Debugging.)
4. From your computer, open MTK Droid Tools that you have downloaded above and extract it to your desired location.
5. Open MTK Droid Tools.exe from the extracted folder (Run as administrator). Wait for the tool to detect your device. (If UBIFS warning appeared in the status message, this process will not work for you. Only ext4 supported.). Notice on the bottom-left part of the tool, a YELLOW color indicator means that your android device is does not have root shell yet. If it is GREEN already, proceed to step 7. How to ROOT your Mediatek Device or proceed to Step 6.


6.  Click ROOT button to enable root shell your device. Wait for the progress bar on the Status, see your phone to Grant Superuser access. If the color indicator turns GREEN, then you have successfully enabled root shell for your device.

7.  Now, select the Root, Backup, Recovery tab and and further choose To Use Boot From Phone from the selections. Click Recovery and Boot, a message prompt will appear “To make CWM recovery automatically”, click YES.


8. Wait for the tool to build the CWM recovery and another prompt will appear “install patched boot to phone?” select NO, wait a little bit more and another prompt will appear again “install created recovery to phone”, now select YES.
9. When the tool ask you to reboot your phone to recovery, click Yes and it will reboot to CWM recovery shortly. Check out your new custom recovery.
Congratulations! You now have Installed ClockworkMod custom recovery on your MediaTek android device. You can now enjoy apps that requires Superuser rights, mods and ROMs that requires flashing from CWM.

All the Best!!!


Available link for download

Read more »