Showing posts with label linux. Show all posts
Showing posts with label linux. Show all posts
Thursday, February 9, 2017
How To Stream Audio To A Chromecast Or DLNA UPnP Device From Linux Using pulseaudio dnla
How To Stream Audio To A Chromecast Or DLNA UPnP Device From Linux Using pulseaudio dnla
pulseaudio-dlna is a lightweight streaming server that makes it easy to stream audio from a Linux computer that uses PulseAudio, to a DLNA / UPnP or Chromecast device in the same network.
The tool discovers all UPnP / DLNA / Chromecast renderers in the network and adds them as sinks to PulseAudio. You can then either select the sinks from the sound settings, or use pavucontrol to control which applications can stream to the UPnP / DLNA or Chromecast device.
Lets get started with installing and using pulseaudio-dlna.
For Ubuntu 16.04, 15.10 and 14.04, Linux Mint 17.x and derivatives, pulseaudio-dlna can be installed from a PPA. To add the PPA and install pluseaudio-dlna, use the following commands:
sudo add-apt-repository ppa:qos/pulseaudio-dlna
sudo apt-get update
sudo apt-get install pulseaudio-dlna
For how to install it in other Linux distributions, see the pulseaudio-dnla instructions.
Now, to run it, type the following in a terminal:
pulseaudio-dlnaOn the other end, make sure the DLNA / UPnP or Chromecast device is powered on.
Next, open the system sound settings. In Ubuntu (Unity), from the Sound Menu, select Sound Settings and your DLNA / UPnP and/or Chromecast device should show up in the output list:

Select the device you want to stream to and... thats it (well, for DLNA / UPnP devices, you may need to accept the connection - a popup should be displayed on the device screen; Chromecast should start streaming immediately).
In my test under Ubuntu 16.04, the sound was perfect while using the default pulseaudio-dlna settings however, the sound was distorted when streaming to a Chromecast. To get it to work properly, I ran pulseaudio-dlna with mp3 as the codec and ffmpeg as the encoder backend:
pulseaudio-dlna --codec mp3 --encoder-backend=ffmpegOf course, this was the case for me, and it might not be needed in other cases. Update: pulseaudio-dlna was updated and mp3 is now prioritized over flac for Chromecasts.
Note: to be able to use ffmpeg as the encoder backend, youll need to install it. Its available in the official Ubuntu 15.10 and 16.04 repositories (so to install it, use: "sudo apt-get install ffmpeg") however, its not for Ubuntu 14.04.
For Ubuntu 14.04, you can search for a PPA that provides ffmpeg (use e.g. Y PPA Manager to search in Launchpad PPAs) - heres one that has ffmpeg backported from a newer Ubuntu version, but note that I didnt test it -, or install it from source.
pulseaudio-dlna allows changing the server port, force auto reconnect, set the cover mode (whats displayed on the DLNA / Chromecast device) and much more. To see all the available pulseaudio-dlna options, type:
pulseaudio-dlna --helpIf you want to send single audio streams to the device, you can use pavucontrol. To install it in Ubuntu, use the following command:
sudo apt-get install pavucontrolThen launch pavucontrol (it shows up as PulseAudio Volume Control in the menu / Dash) and on the Playback tab, change the stream to the DNLA / Chromecast device, only for the apps you want to use for streaming. As an example, heres Audacious set to stream to a Chromecast device:

For more information about pulseaudio-dlna, bug reports, etc., see its GitHub page.

Available link for download

Wednesday, February 8, 2017
How To Verify MD5 Checksum in Windows Mac Linux and Android
How To Verify MD5 Checksum in Windows Mac Linux and Android
Md5sum is a mixture of numbers and letters which is unique for every file or data. Commonly md5sum is used to verify the integrity of files, encrypt data, etc. We can ensure that we get the correct and complete file or data from the provider by verifying the md5 checksum.
As an Android user I am frequently changing ROM in my phone. In my home my broad band gives Does not have a valid IP configuration error at least once a day. Sometimes the error comes while I download the ROM package. So it is necessary to verify the MD5 checksum of downloaded file before flashing it as flashing the corrupted or wrong file is enough to brick the phone.
In this post i included the ways to check the file sum in Windows, Mac , Linux and Android.
1. Download and Install HashTab From Here or Here
2. After Installation .. Right click on any file you wish to check the md5sum and click Properties.
3. In the Properties window click on File Hashes tab to get the md5 hash details.

1. Open Terminal App and navigate to files directory.
2. Type md5 your_file_name.extension Or Type md5 followed by one space, then drag and drop the file to the terminal.
3. Hit Enter....and wait till the terminal returns the md5 hash....Thats it.
1. Open Terminal App.
2. Navigate to the files directory
3. Now type md5sum your_file_name.extension or Type md5sum followed by one space, then drag and drop the file to the terminal.
4. Hit Enter...done.
In Android there are many File Management apps available in Play store which gives md5sum along with other properties. I use ES File manager in my mobile since my first android mobile. So, I included the method to find md5sum in Android using ES File Manager.
1. Download and install ES File Manager from Play Store
2. Open ES File Manager and Navigate to the file you wish to check the md5 sum.
3. Long press on the file and select Properties from the More menu.

4.Now In the Properties Dialog...tap on Show checksum.

5. In the next dialog check MD5 checkbox and tap on Calculate.

Thats it done.
As an Android user I am frequently changing ROM in my phone. In my home my broad band gives Does not have a valid IP configuration error at least once a day. Sometimes the error comes while I download the ROM package. So it is necessary to verify the MD5 checksum of downloaded file before flashing it as flashing the corrupted or wrong file is enough to brick the phone.
In this post i included the ways to check the file sum in Windows, Mac , Linux and Android.
How To Check MD5sum Of File in Windows ?
1. Download and Install HashTab From Here or Here
2. After Installation .. Right click on any file you wish to check the md5sum and click Properties.
3. In the Properties window click on File Hashes tab to get the md5 hash details.
How To Check MD5sum Of File in Mac ?
1. Open Terminal App and navigate to files directory.
2. Type md5 your_file_name.extension Or Type md5 followed by one space, then drag and drop the file to the terminal.
3. Hit Enter....and wait till the terminal returns the md5 hash....Thats it.
How To Check MD5sum Of File in Linux/Ubuntu ?
1. Open Terminal App.
2. Navigate to the files directory
3. Now type md5sum your_file_name.extension or Type md5sum followed by one space, then drag and drop the file to the terminal.
4. Hit Enter...done.
How To Check MD5sum Of File in Android ?
In Android there are many File Management apps available in Play store which gives md5sum along with other properties. I use ES File manager in my mobile since my first android mobile. So, I included the method to find md5sum in Android using ES File Manager.
1. Download and install ES File Manager from Play Store
2. Open ES File Manager and Navigate to the file you wish to check the md5 sum.
3. Long press on the file and select Properties from the More menu.
4.Now In the Properties Dialog...tap on Show checksum.
5. In the next dialog check MD5 checkbox and tap on Calculate.
Thats it done.
Available link for download
Wednesday, February 1, 2017
Install LibreOffice 5 0 In Ubuntu Or Linux Mint Via PPA
Install LibreOffice 5 0 In Ubuntu Or Linux Mint Via PPA
LibreOffice 5.0 was released last week and it includes numerous changes, such as UI improvements, better HiDPI support, new icon theme by KDE called Breeze, much improved Spreadsheet, better filters for documents and more. For a complete list of changes, see THIS page.
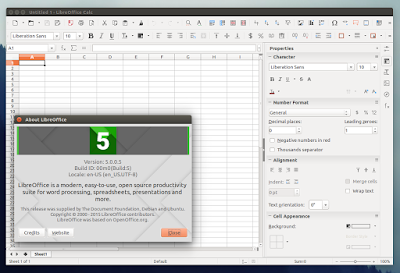
According to the Document Foundation blog, the latest LibreOffice 5.0 is the "cornerstone of the mobile clients on Android and Ubuntu Touch, as well as the upcoming cloud version".
In Ubuntu, Linux Mint and derivatives, the latest LibreOffice 5.0 (Fresh) can be installed either by using a PPA or by downloading and installing the official LibreOffice debs.
Installing LibreOffice via PPA and not by using the official *.deb files is the recommended way of installing/upgrading LibreOffice in Ubuntu (as stated here) because the .deb files provided by The Document Foundation are intentionally built against a very old baseline for maximum compatibility.
Installing LibreOffice via PPA and not by using the official *.deb files is the recommended way of installing/upgrading LibreOffice in Ubuntu (as stated here) because the .deb files provided by The Document Foundation are intentionally built against a very old baseline for maximum compatibility.
Furthermore, by using the PPA, you can automatically get updates as well as easily go back to the LibreOffice version available in the official Ubuntu repositories if for some reason youre not satisfied with the new release, by using PPA Purge.
Below youll find instructions on how to install LibreOffice in Ubuntu or Linux Mint via PPA as well as how to purge the PPA in case you want to go back to the LibreOffice version you were using before adding this PPA.
Install LibreOffice 5.0 in Ubuntu Or Linux Mint via PPA
Important: There are two PPAs you can use to install LibreOffice 5.0 in Ubuntu and Linux Mint: the LibreOffice Fresh PPA which provides the latest stable LibreOffice Fresh (so for instance when LibreOffice 5.1 comes out, this PPA will be updated with LibreOffice 5.1) and the LibreOffice 5.0.x PPA (which Ive used for the instructions below) which only provides LibreOffice 5.0.x updates.
Right now, both PPAs provide the same LibreOffice version. If you prefer to use the LibreOffice Fresh PPA, replace "ppa:libreoffice/libreoffice-5-0" in the commands below with "ppa:libreoffice/ppa".
At the time Im writing this article, the LibreOffice 5.0.x PPA provides LibreOffice 5.0.0 RC5 which is identical to the final release.
Linux Mint 17.2 only: LibreOffice is pinned in Linux Mint 17.2 and cant be upgraded by using a PPA. To be able to update LibreOffice to version 5.0 via PPA, you need to create a file called "libreoffice-libreoffice-5-0.pref" under /etc/apt/preferences.d/ - to do this automatically, use the following command:
gksu gedit /etc/apt/preferences.d/libreoffice-libreoffice-5-0.prefPackage: *
Pin: release o=LP-PPA-libreoffice-libreoffice-5-0
Pin-Priority: 701Then save the file and continue with the instructions below.
To add the LibreOffice 5.0.x PPA and upgrade to the latest LibreOffice 5.0 in Ubuntu 15.04, 14.04 or 12.04 / Linux Mint 17.2 (after following the steps above), 17.1, 17 or 13, use the following commands:
sudo add-apt-repository ppa:libreoffice/libreoffice-5-0
sudo apt-get update
sudo apt-get dist-upgrade
If you want to try the new Breeze LibreOffice icon theme (which you can see in the screenshot above), install it by using the following command:
sudo apt-get install libreoffice-style-breezeHow to revert the changes
If you dont want to continue using LibreOffice 5.0, you can downgrade it to the previous version available in the repositories by using PPA Purge. To do this, firstly install PPA Purge:
sudo apt-get install ppa-purgeThen, purge (this will disable the PPA and downgrade the packages installed from this PPA) the PPA using the following command:
sudo ppa-purge ppa:libreoffice/libreoffice-5-0For Linux Mint, youll have to specify the Ubuntu codename because PPA Purge doesnt officially support it. So for Linux Mint 17, 17.1 and 17.2 which are based on Ubuntu 14.04 Trusty Tahr, use the following command:
sudo ppa-purge -d trusty ppa:libreoffice/libreoffice-5-0Or, for Linux Mint 13 (based on Precise), use:
sudo ppa-purge -d precise ppa:libreoffice/libreoffice-5-0Available link for download
Friday, January 13, 2017
How To Set Up AFP File Sharing On Linux for Use With Time Machine
How To Set Up AFP File Sharing On Linux for Use With Time Machine

Preface:
In past versions of Mac OS X, the built in backup tool, Time Machine was a lot less picky about where you back up your files to. You could even back up to a Samba file share if you enabled the "unsupported volumes" hack.
defaults write com.apple.systempreferences TMShowUnsupportedNetworkVolumes 1
But that ended with Snow Leopard. Starting with the release of OSX 10.7 Lion, Apple started cinching down on where you could back up your system to, ostensibly for security reasons. Now, with Mac OS X 10.8 "Mountain Lion", its gotten to the point where essentially the only places you can back up your system using Time Machine are either on another Mac OS X File Server or on an Apple Time Capsule. My assumption is that their intent is merely to bolster their hardware sales.
I dont know too many people who stay exclusively within the "walled garden" for all their computing needs. Certainly people with a lot more money to burn than me. But for a much more economical approach than shelling out around $300 for an over-glorified USB drive, you could just follow this guide to set up your Ubuntu file server to look and behave exactly like Time Machine would expect a real Time Capsule or Mac to.
Step 1: Install Netatalk
installing Netatalk, the open source Apple Filing Protocol (AFP) implementation is easy! The packages are already in the repos, which makes me wonder why its not enabled by default.
Install the following packages:
sudo apt-get install netatalk libc6-dev avahi-daemon libnss-mdns
Step 2: Configure /etc/nsswitch.conf
Once those packages are installed, there are actually five configuration files that need to be edited in order for the Macs on your network to access your AFP shares properly.
sudo nano /etc/nsswitch.conf
locate the line that reads
hosts: files mdns4_minimal [NOTFOUND=return] dns mdns4
and add mdns to it so it now reads
hosts: files mdns4_minimal [NOTFOUND=return] dns mdns4 mdns
press ctrl+o to save and ctrl+x to exit.
Step 3: /etc/avahi/services/afpd.service
sudo nano /etc/avahi/services/afpd.service
paste the following code
<?xml version="1.0" standalone=no?><!--*-nxml-*-->
<!DOCTYPE service-group SYSTEM "avahi-service.dtd">
<service-group>
<name replace-wildcards="yes">%h</name>
<service>
<type>_afpovertcp._tcp</type>
<port>548</port>
</service>
<service>
<type>_device-info._tcp</type>
<port>0</port>
<txt-record>model=TimeCapsule</txt-record>
</service>
</service-group>
NOTE: Just for fun you can change the string "<txt-record>model=TimeCapsule</txt-record>" to the following devices to change how they appear in Finder on OSX:
| Image | Apple Product | Identifier Strings |
 | Airport Express | AirPort4 AirPort4,102 AirPort4,107 |
 | Airport Extreme | AirPort Airpor5 AirPort5,104 AirPort5,105 AirPort5,108 AirPort5,114 AirPort5,117 |
 | Aluminum 20” iMac | iMac7,1 iMac8,1 |
 | Aluminum 24” iMac | iMac9,1 |
 | Aluminum Unibody MacBook | MacBook5,1 |
 | Apple Cinema Display | Any invalid or blank string |
 | AppleTV | AppleTV AppleTV1,1 |
 | Black MacBook | MacBook1,1,Black MacBook2,1,Black MacBook3,1,Black MacBook4,1,Black |
 | eMac | PowerMac4,4 PowerMac6,4 |
 | Flower Pot G4 iMac 15” | PowerMac4,2 |
 | Flower Pot G4 iMac 17” | PowerMac4,5 PowerMac6,1 |
 | Flower Pot G4 iMac 20” | PowerMac6,3 |
 | Graphite G4 PowerMac | PowerMac |
Available link for download
Read more »
Tuesday, January 3, 2017How To Stream To Twitch From Linux Using OBS StudioHow To Stream To Twitch From Linux Using OBS StudioOBS Studio is a free, open source application which allows video recording and live streaming. The app can be used to stream to various popular websites such as Twitch.tv, YouTube, Hitbox.tv, Vaughn Live / iNSTAGIB.tv, DailyMotion, Connectcast.tv, GoodGame.ru, CyberGame.tv, CashPlay.tv along with custom streaming servers.  The original Open Broadcaster Software was rewritten, with the main goal of being multiplatform, along with a more powerful API and a more thorough feature set. The new multiplatform OBS Studio is currently in alpha and is available for Linux, Mac OS X and Windows. OBS features:
In Linux, OBS allows recording a window or a monitor, on top of which you can add various overlays such as an image, text, webcam or media source and of course, audio input (microphone) and output (the game, a music player, etc.), with various options. Below Ill try to make a quick start guide for streaming to Twitch.tv via OBS running under Linux (Ubuntu in my case). But before that, you can see a quick test Ive done earlier with OBS Studio (0.10.1) streaming World of Warcraft to Twitch from Ubuntu 15.04 (there are no video quality settings unfortunately because thats only available for Twitch partners). Install OBS Studio (Multiplatform) in Ubuntu or Linux Mint1. Install FFmpeg. For Ubuntu 14.04 / Linux Mint 17.x / elementary OS Freya and so on, youll need to add a FFmpeg PPA because these Ubuntu versions dont provide FFmpeg. Add the PPA and install FFmpeg using the following commands: These FFmpeg packages are backported from Ubuntu 15.04 and they dont overwrite libav so they wont break anything. For Ubuntu 15.04, FFmpeg is available in the official repositories so to install it, use the following command: 2. Install OBS Studio. To add the official OBS Studio PPA and install the app in Ubuntu 16.04, 15.10 or 14.04, Linux Mint 17.x, elementary OS Freya and so on, use the following commands: OBS Studio for other Linux distributions (unofficial packages): Arch Linux (AUR - git version), openSUSE and Gentoo. For other Linux distributions, youll need to build it from source. Setting up OBS Studio for streaming to Twitch.tv1. Add your Twitch Stream Key to OBS  The first thing youll need to do to be able to stream to Twitch.tv using OBS is to get your Twitch Stream Key from HERE - copy the key and in OBS select "Settings" and on the Stream tab, select "Twitch" under "Service", then paste the key you just copied under "Stream key":  Here you should also select the Twitch server thats closest to you. 2. Add sources Next, youll want to add some sources. The first source should be the video (game) source so click the "+" icon under "Sources" and select "Window capture (Xcomposite)", click OK and select the game window:  You can use "Screen capture (XSHM)" instead of "Window capture", but I recommend capturing the window because youll be able to have other windows on top of the game without them showing up in your live stream. Then, add any other sources youd like, like "Video Capture Device" (webcam), "Audio Input Capture" (microphone), "Audio Output Capture" (the sound you hear through the speakers - it can be the game sound, a music player, etc.), text, an image and so on. Note that the source order is important. For instance, if youre playing a fullscreen game and the webcam source ("Video Capture Device") is under the "Window capture" or "Screen capture" source, it wont show up, so youll need to move it using the up/down arrows so that the webcam source is above the capture source. The same goes for text and image overlays, etc. 3. Optional configuration tweaks a) if your video colors are incorrect, select the source from the "Sources" list, click "Properties" (its the third button under "Sources") and enable "Swap red and blue":  b) if your computer has a slow CPU and youre getting a low quality / fps live stream, you can try changing the x264 CPU preset to "superfast" or "ultrafast" (default is "veryfast"):  This can be done via Settings > Output > select "Advanced" for the "Output Mode" from the dropdown > on the Streaming tab scroll down and youll find an option called "CPU Usage Preset". If the performance is still bad, you can try setting a lower video resolution and bitrate (these settings can be found in the same "Streaming" tab as the "CPU Usage Preset" - see above). c) if you have an old computer and/or a bad Internet connection, you may want to decrease the frame rate (default is 30) or, if you have a good computer and Internet connection and you play something like Arena/PvP, you my want to increase it. The FPS settings can be found in OBS Settings > Video (you can switch to "Integer FPS value" to use a custom value instead of those predefined under "Common FPS Values"):  You may also want to read the official OBS quick start and overview guides (but note that they are for the old OBS version so the UI looks different and some settings maybe not be available any more, etc.). Report any bugs you may encounter with OBS, HERE. Also see: Twitch.tv Indicator Lets You Know When The Channels You Follow Go Live Available link for download
Monday, December 19, 2016Install Proxy Squid Lusca di Linux Ubuntu Server 14 04 dengan MikrotikInstall Proxy Squid Lusca di Linux Ubuntu Server 14 04 dengan Mikrotik Squid Squid adalah sebuah daemon yang digunakan sebagai proxy server dan web cache. Squid memiliki banyak jenis penggunaan, mulai dari mempercepat server web dengan melakukan caching permintaan yang berulang-ulang, caching DNS, caching situs web, dan caching pencarian komputer di dalam jaringan untuk sekelompok komputer yang menggunakan sumber daya jaringan yang sama, hingga pada membantu keamanan dengan cara melakukan penyaringan (filter) lalu lintas. Meskipun seringnya digunakan untuk protokol HTTP dan FTP, Squid juga menawarkan dukungan terbatas untuk beberapa protokol lainnya termasuk Transport Layer Security (TLS), Secure Socket Layer (SSL), Internet Gopher, dan HTTPS. Versi Squid 3.1 mencakup dukungan protokol IPv6 dan Internet Content Adaptation Protocol (ICAP). Squid pada awalnya dikembangkan oleh Duane Wessels sebagai "Harvest object cache", yang merupakan bagian dari proyek Harvest yang dikembangkan di University of Colorado at Boulder. Pekerjaan selanjutnya dilakukan hingga selesai di University of California, San Diego dan didanai melalui National Science Foundation. Squid kini hampir secara eksklusif dikembangkan dengan cara usaha sukarela. Squid umumnya didesain untuk berjalan di atas sistem operasi mirip UNIX, meski Squid juga bisa berjalan di atas sistem operasi Windows. Karena dirilis di bawah lisensi GNU General Public License, maka Squid merupakan perangkat lunak bebas. Web Proxy Caching merupakan sebuah cara untuk menyimpan objek-objek Internet yang diminta (seperti halnya data halaman web) yang bisa diakses melalui HTTP, FTP dan Gopher di dalam sebuah sistem yang lebih dekat dengan situs yang memintanya. Beberapa penjelajah web dapat menggunakan cache Squid lokal untuk sebagai server proxy HTTP, sehingga dapat mengurangi waktu akses dan juga tentu saja konsumsi bandwidth. Hal ini sering berguna bagi para penyedia layanan Internet untuk meningkatkan kecepatan kepada para pelanggannya, dan LAN yang membagi saluran Internet. Karena memang bentuknya sebagai proxy (ia berlaku sebagaimana layaknya klien, sesuai dengan permintaan klien), web cache bisa menyediakan anonimitas dan keamanan. Tapi, web cache juga bisa menjadi masalah yang signifikan bila melihat masalah privasi, karena memang ia dapat mencatat banyak data, termasuk URL yang diminta oleh klien, kapan hal itu terjadi, nama dan versi penjelajah web yang digunakan klien serta sistem operasinya, dan dari mana ia mengakses situs itu. Selanjutnya, sebuah program klien (sebagai contoh adalah penjelajah web) bisa menentukan secara ekplisit proxy server yang digunakan bila memang hendak menggunakan proxy (umumnya bagi para pelanggan ISP) atau bisa juga menggunakan proxy tanpa konfigurasi ekstra, yang sering disebut sebagai "Transparent Caching", di mana semua permintaan HTTP ke jaringan luar akan diolah oleh proxy server dan semua respons disimpan di dalam cache. Kasus kedua umumnya dilakukan di dalam perusahaan dan korporasi (semua klien berada di dalam LAN yang sama) dan sering memiliki masalah privasi yang disebutkan di atas. Squid memiliki banyak fitur yang bisa membantu melakukan koneksi secara anonim, seperti memodifikasi atau mematikan beberapa field header tertentu dalam sebuah permintaan HTTP yang diajukan oleh klien. Saat itu terpenuhi, apa yang akan dilakukan oleh Squid adalah tergantung orang yang menangani komputer yang menjalankan Squid. Orang yang meminta halaman web melalui sebuah jaringan yang secara transparan yang menggunakan biasanya tidak mengetahui bahwa informasi semua permintaan HTTP yang mereka ajukan dicatat oleh Squid. Lusca Sama seperti Squid, hanya saja Lusca merupakan cabang dari squid-2 development tree. Proyek Lusca bertujuan untuk memperbaiki kekurangan dalam basis kode squid-2, sementara tetap mempertahankan fungsi Squid-2 dan stabilitasnya. Proyek ini menyediakan jalur migrasi untuk pengguna squid-2 ke basis kode aktif, yang dikembangkan oleh pengembang dan penggunanya, perangkat lunak yang stabil dan disarankan untuk menyebarkannya. Mengapa Menggunakan Lusca? Seperti pendahulunya, Lusca mendukung mayoritas HTTP/1.1 HTTP/1.0 dan protokol dan caching konstruksi termasuk ETag / Varian entitas. Antara lain, mendukung HTTP balancing konten beban, kegagalan, cerdas permintaan / jawaban routing, memori kinerja tinggi dan disk caching, sistem kontrol akses terlalu fleksibel, dukungan untuk kedua kinerja tinggi maju dan mundur mode proxy. Hal ini mendukung berbagai protokol clustering, termasuk ICPv2,, ICPv3 Carp dan HTCP baik untuk clustering dan kontrol. Lusca mendukung Cisco intersepsi WCCPv2 di kedua perangkat lunak dan perangkat keras forwarding mode. Pengguna, Administrator dan Pengembang sama-sama diundang untuk berpartisipasi dalam komunitas kecil tapi semakin banyak pengguna yang ingin terus menggunakan dipahami dengan baik, web proxy stabil / platform Cache tetapi membutuhkan sesuatu dengan kinerja yang lebih, fitur dan skalabilitas. Lusca terus meliputi perbaikan dan perkembangan dari proyek squid mana yang tepat bersama daftar sendiri tumbuh perbaikan. Tahap Penginstallan
Available link for download
Wednesday, November 23, 2016Instal AMD Catalyst Linux Display Driver 13 12Instal AMD Catalyst Linux Display Driver 13 12Pada tanggal 19 Desember kemarin AMD merilis AMD Catalyst Display Driver versi 13.12. Cara menginstalAMD catalyst : 1. Unduh AMD Catalyst Display Driver versi 13.12. 2. Ekstrak berkas yang diunduh tadi. 3. Klik kanan berkas .run -> Properties -> Permission -> centang Execute. 4. Dobel klik berkas .run, tunggu sampai installernya muncul, selanjutnya ikuti petunjuk installer. Atau menggunakan aplikasi khusus untuk menginstal AMD Catalyst terbaru.     Unduh AMD Catalyst Install disini. Available link for download
Monday, November 14, 2016Install OwnCloud di Linux Ubuntu Server 14 04 LTSInstall OwnCloud di Linux Ubuntu Server 14 04 LTS ownCloud menempatkan kontrol kepada pengguna teknologi informasi itu sendiri dan juga menawarkan penyedia layanan, pusat dan bagian transmisi yang berfungsi untuk menyediakan solusi sinkronisasi dan berbagi bagi pengguna. ownCloud memberikan akses terhadap berkas-berkas secara universal dengan menggunakan antarmuka jaringan atau WebDAV. ownCloud dipelopori oleh Frank Karlitschek saat ia sedang membicarakan mengenai aplikasi bebas dan terbuka. Proses pemasangan tidak banyak membutuhkan syarat-syarat pada sistemnya dan tidak membutuhkan izin khusus. Kantor pusat ownCloud di Amerika terletak di Boston, Massachusetts dan kantor cabang di Eropa terletak di Jerman. Sejarah. Ide mengenai ownCloud muncul sejak 3 tahun yang lalu, lebih tepatnya pada Januari 2010. Saat itu Frank Karlitschek menginginkan perangkat lunak gratis dan bebas untuk dijadikan sebagai solusi untuk permasalahan pada kala itu. Karlitschek merasa bahwa dunia membutuhkan sesuatu yang mudah digunakan, aman, fleksibel dalam mengatur berkas, dan tanpa mengalami kemunduran pada tempat penyimpanannya. Dalam perjalanannya proyek tersebut bergerak dan menemukan berbagai kontributor, ownCloud berhasil membuat berbagai macam rilis dan tersedia dalam 42 jenis bahasa di dunia. Kemudian proyek ini semakin beralih menjadi komersial sebagai usaha pengembangan terhadap pengguna perusahaan. Tahap Penginstalan
Refrensi: OwnCloud Available link for download
Sunday, October 30, 2016Install GIMP 2 8 16 In Ubuntu Or Linux Mint Via PPAInstall GIMP 2 8 16 In Ubuntu Or Linux Mint Via PPA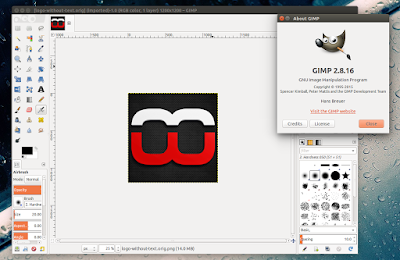 On GIMPs 20th birthday (Nov 22), a new version of the free and open source image editor was released: 2.8.16. This is a bugfix release from the 2.8 stable series and it includes the following changes:
The GIMP 2.8.16 release announcement also mentions that the devs "immediate future plans are to release first public version in the unstable 2.9.x series that will feature fully functional GEGL port, 16/32bit per channel processing, basic OpenEXR support, vastly improved color management implementation, new tools, on-canvas preview for many filters, and more", this being the first milestone towards GIMP 2.10. If you want to try the latest unstable GIMP, you can already do so by using a PPA. Install GIMP 2.8.16 in Ubuntu or Linux MintTo install the latest stable GIMP in Ubuntu (Precise and newer) / Linux Mint and derivatives, you can use Thorsten Stettins PPA. Add the PPA and install GIMP using the following commands: Its important to mention that besides GIMP, this PPA also includes various GIMP plugins, such as GMIC, and GIMP PLugin Registry. For other Linux distributions, Windows and Mac OS X, see the GIMP downloads page. How to revert the changesIn case you dont want to use GIMP 2.8.16 any more and you want to downgrade to the version available in the official Ubuntu repositories, you can purge the PPA using "ppa-purge": Available link for download
Subscribe to:
Posts (Atom)
|
